See some detailed step-by-step builds!
Below you will see 2 of my most exciting builds. The relatively new 1:24 scale BF109 from Airfix, and a incredibly hard to get hold of F6F Hellcat, also 1:24 from Airfix. These two planes are 650+ parts each, took 60+ hours to build, but show an incredible level of detail and allow the modeller to really test his or her skills on construction & painting/weathering. Have a look through the pictures and tell me what you think?
BF 109 - Day 1 - get started.
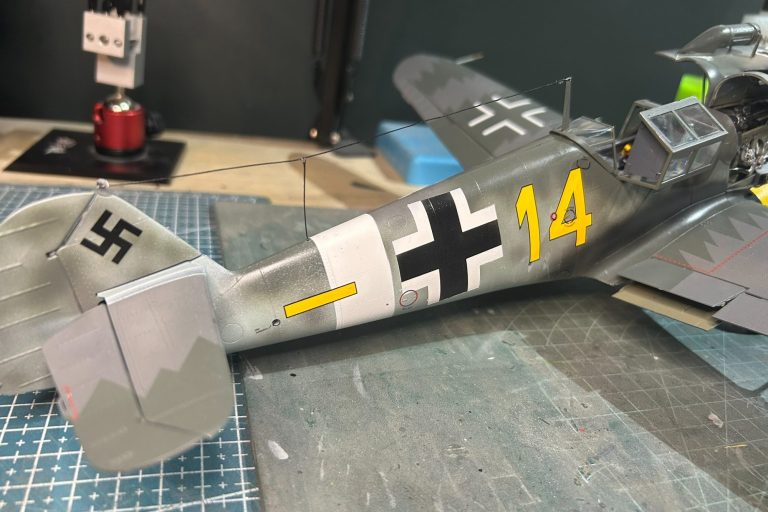
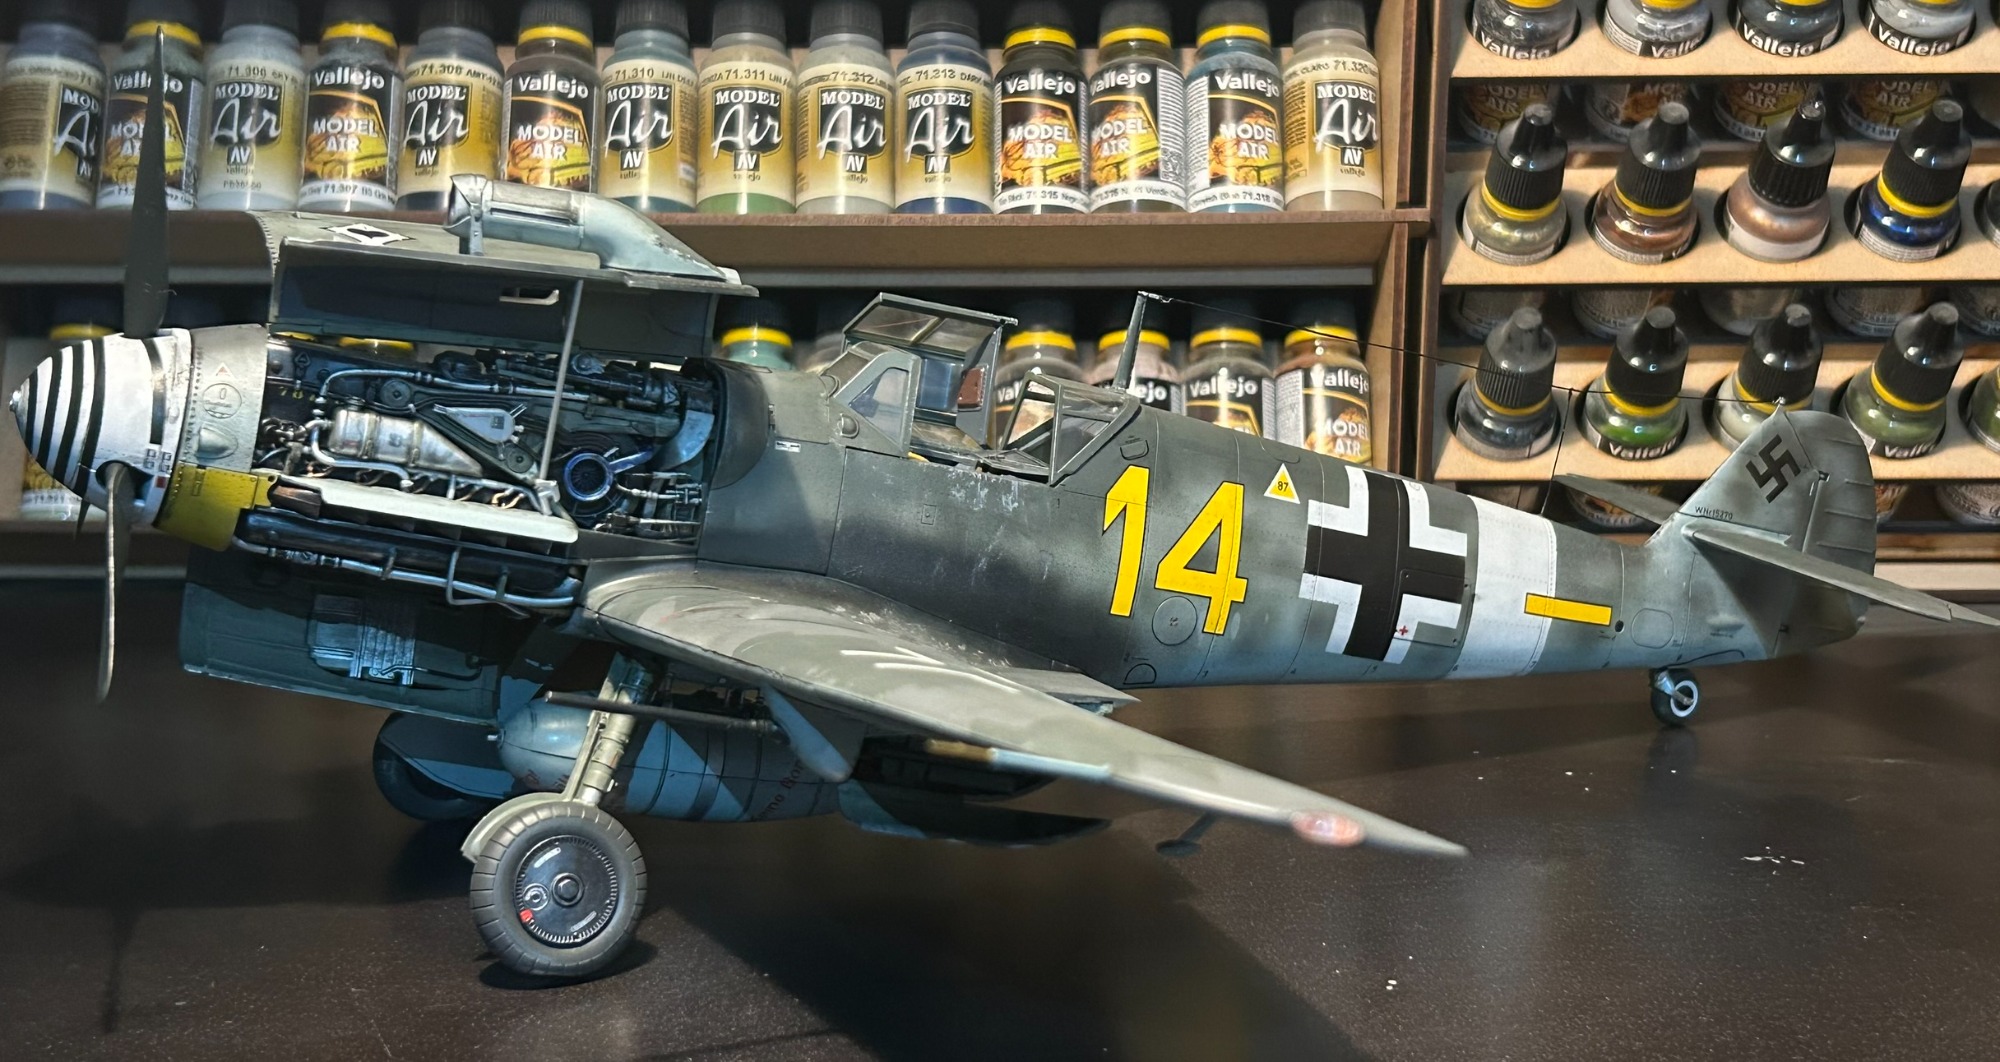
So it's done! Built, painted, decals and varnished, and actually, in the post to my client in Notts. What a kit to build, there are a couple of points I'd do differently next time, but for a first 1:24 kit, I'm happy with the finish!! See what you think!!

Scheme
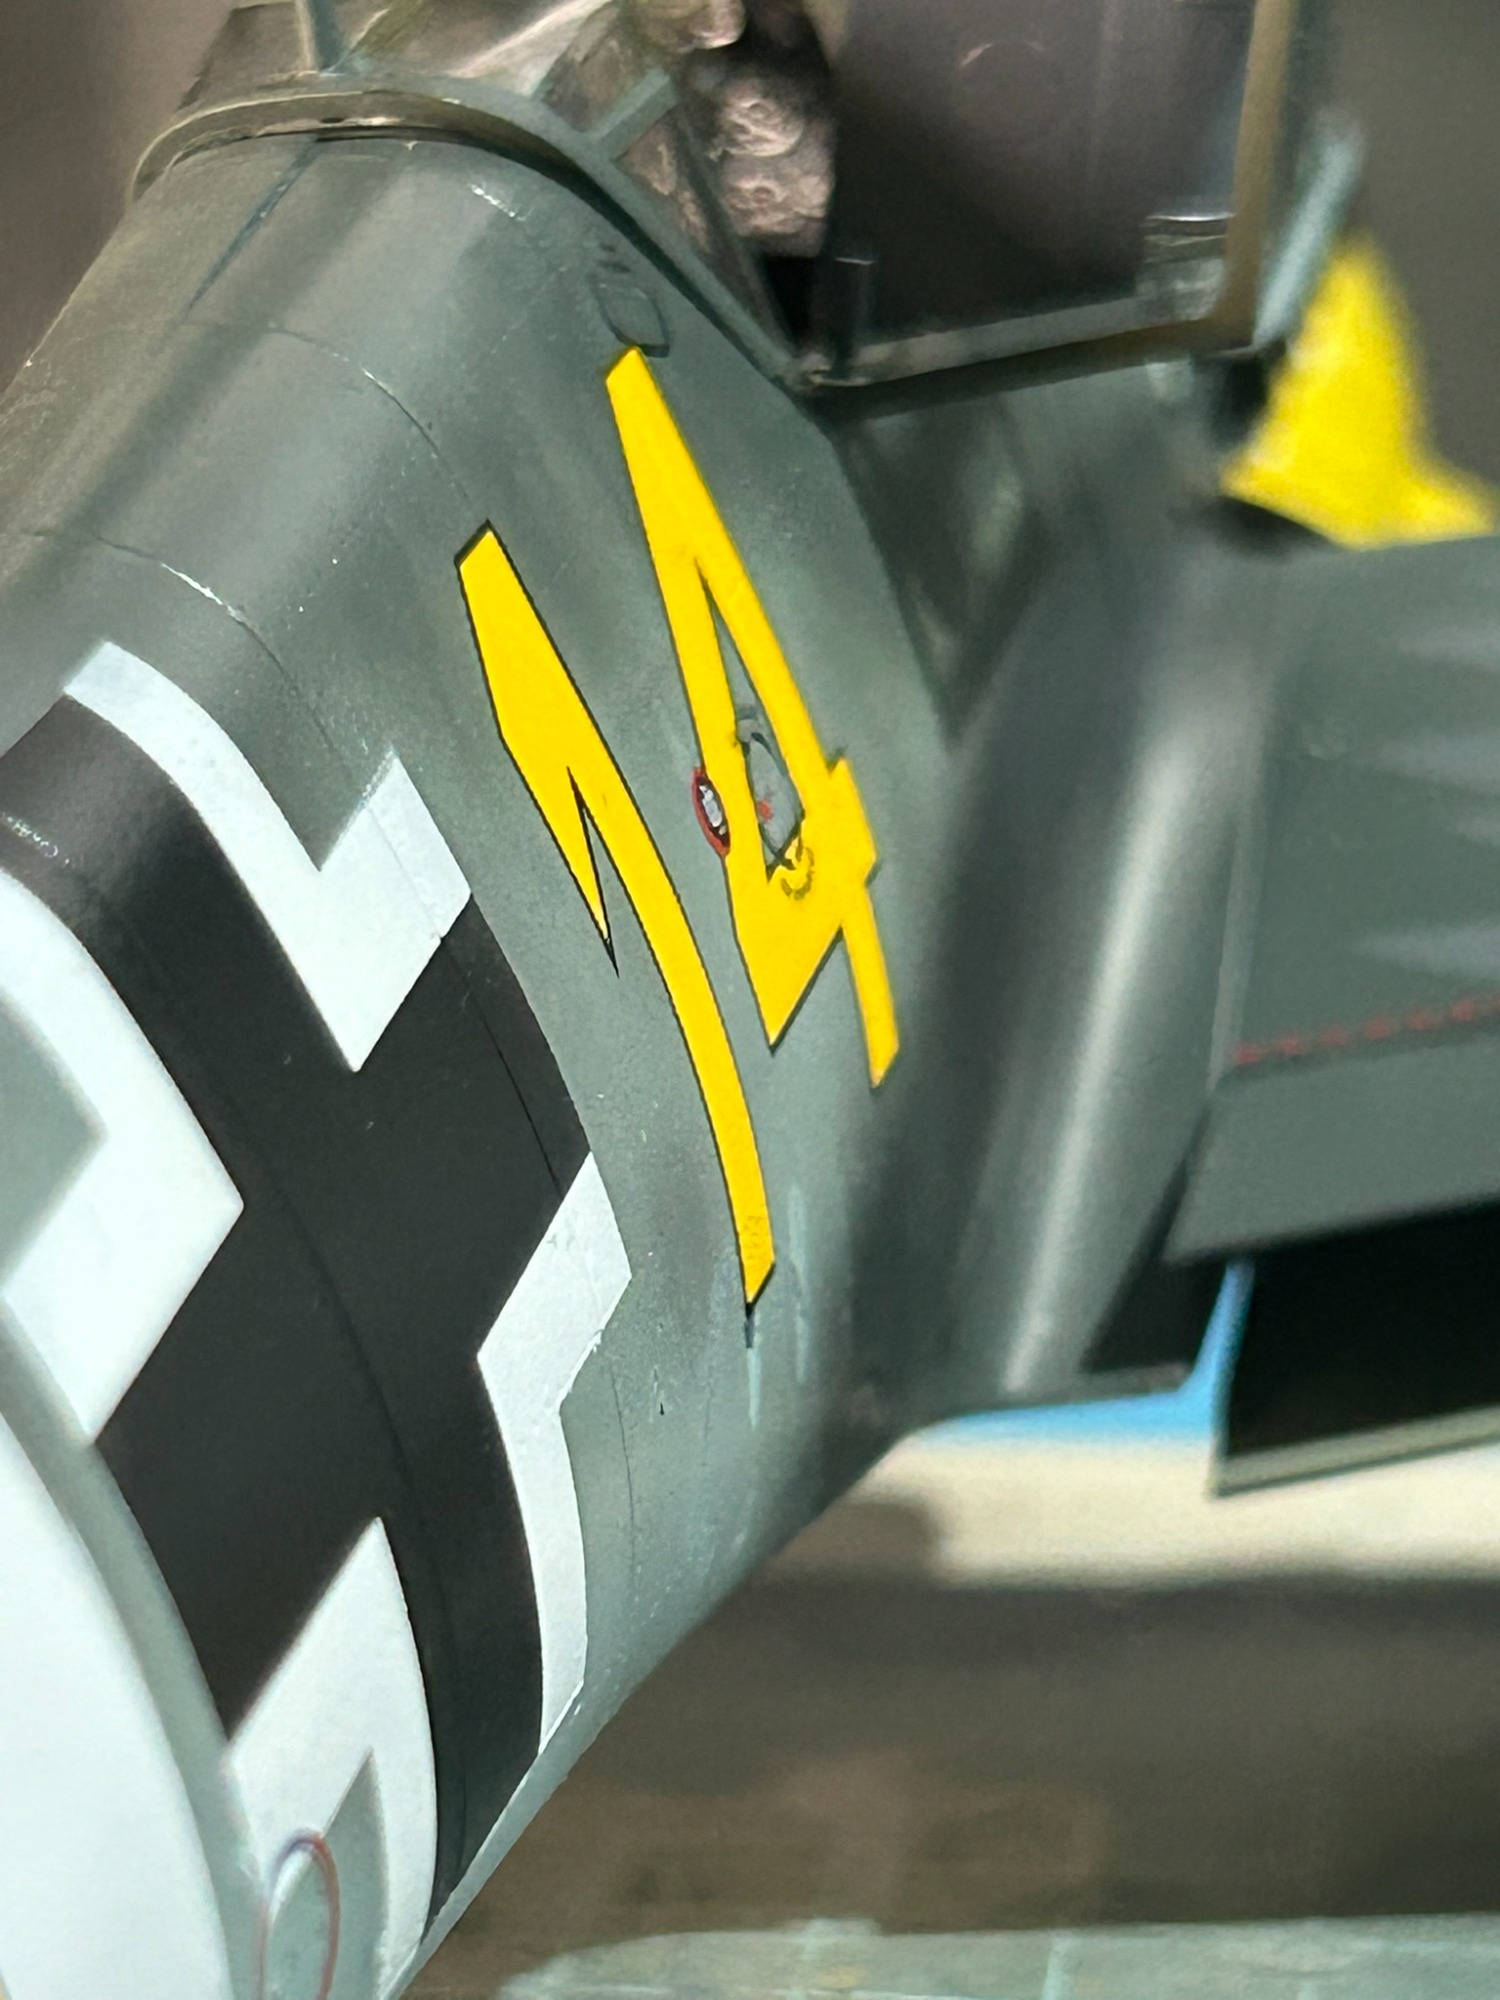
Not a big fan of the captured schemes, I'd rather go with the authentic Luftwaffe and thankfully my client also agreed! He asked me to build with Yellow 14 as the build scheme.
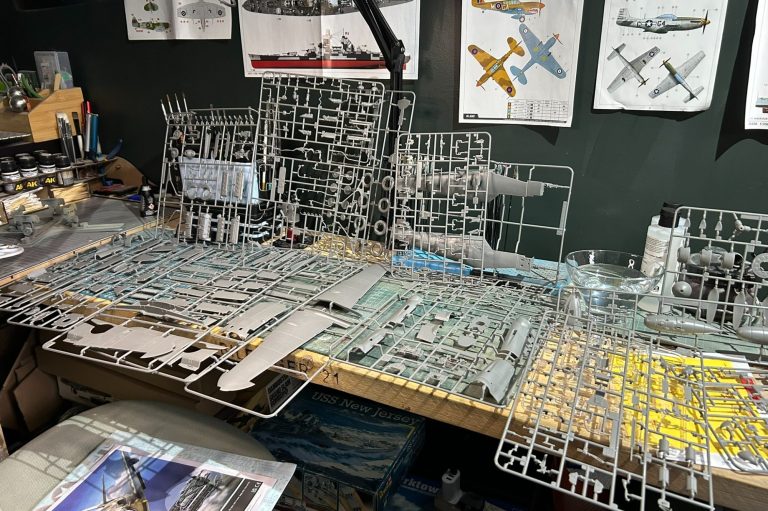
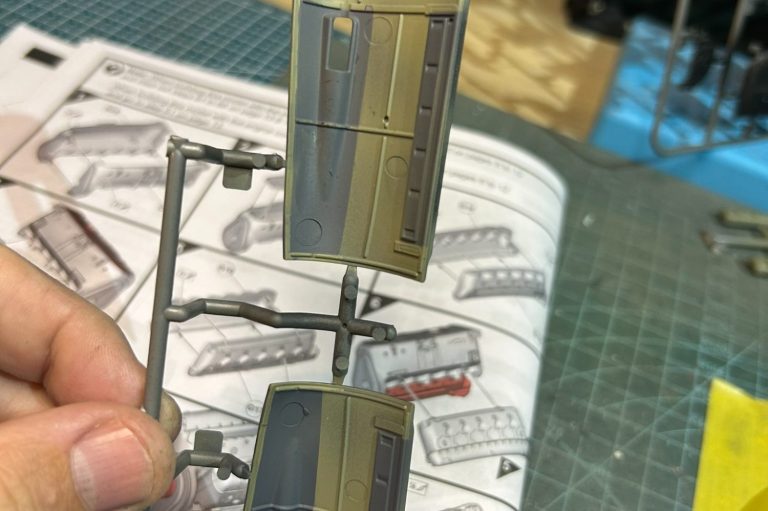
Unboxing
Time to get all the sprus out! I know some people give them a bath to wash off any release agent (to help with painting) but I didn't bother. Just stacked the spru in alphabetical order ready to prime and build.
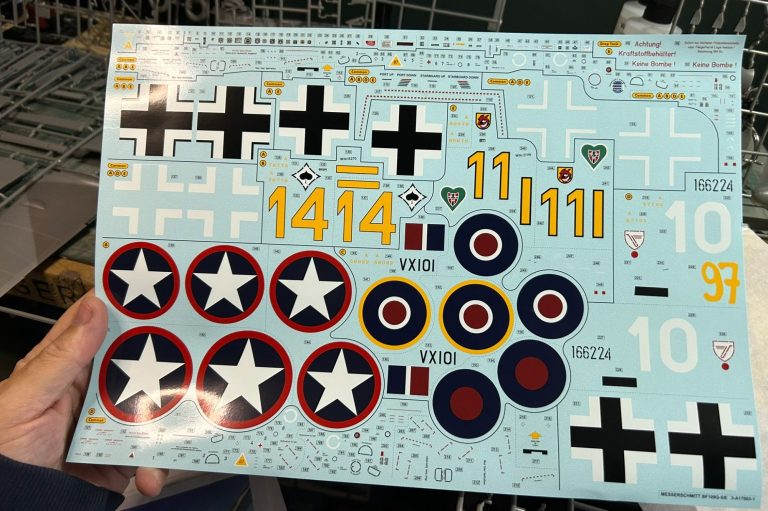
Decal sheet
It will be a while before I need many of these. Well, to my surprise I have not only instrument panel decals, but also engine block decals!!! wow.
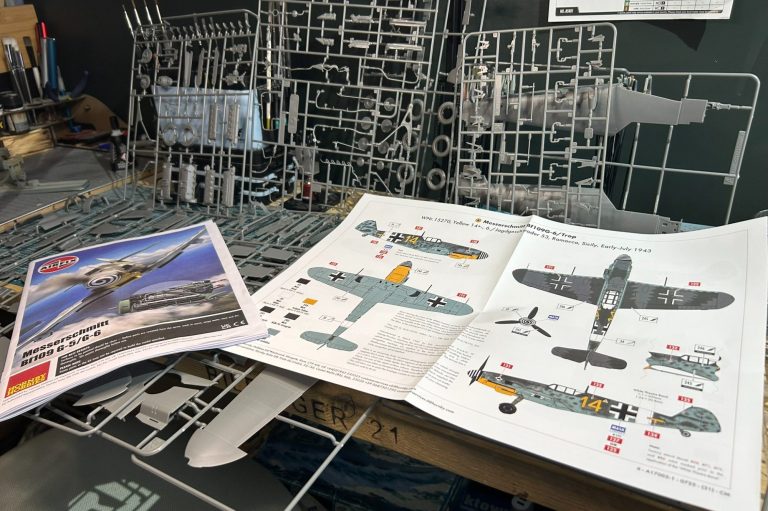
Destructions
I can put a 1:48 kit together blind fold and in the dark, recognising most parts without needing instructions. This however is a new kit, new size and I will ready each and every section carefully. It also helps me know what I need to paint PRIOR to gluing and what can be painted later.

Priming
I use Vallejo primers, I have 5-6 different colours but as I was building the engine block first I chose black. I just used this throughout the build. The primer helps the final paint adhere to the plastic.
Painting
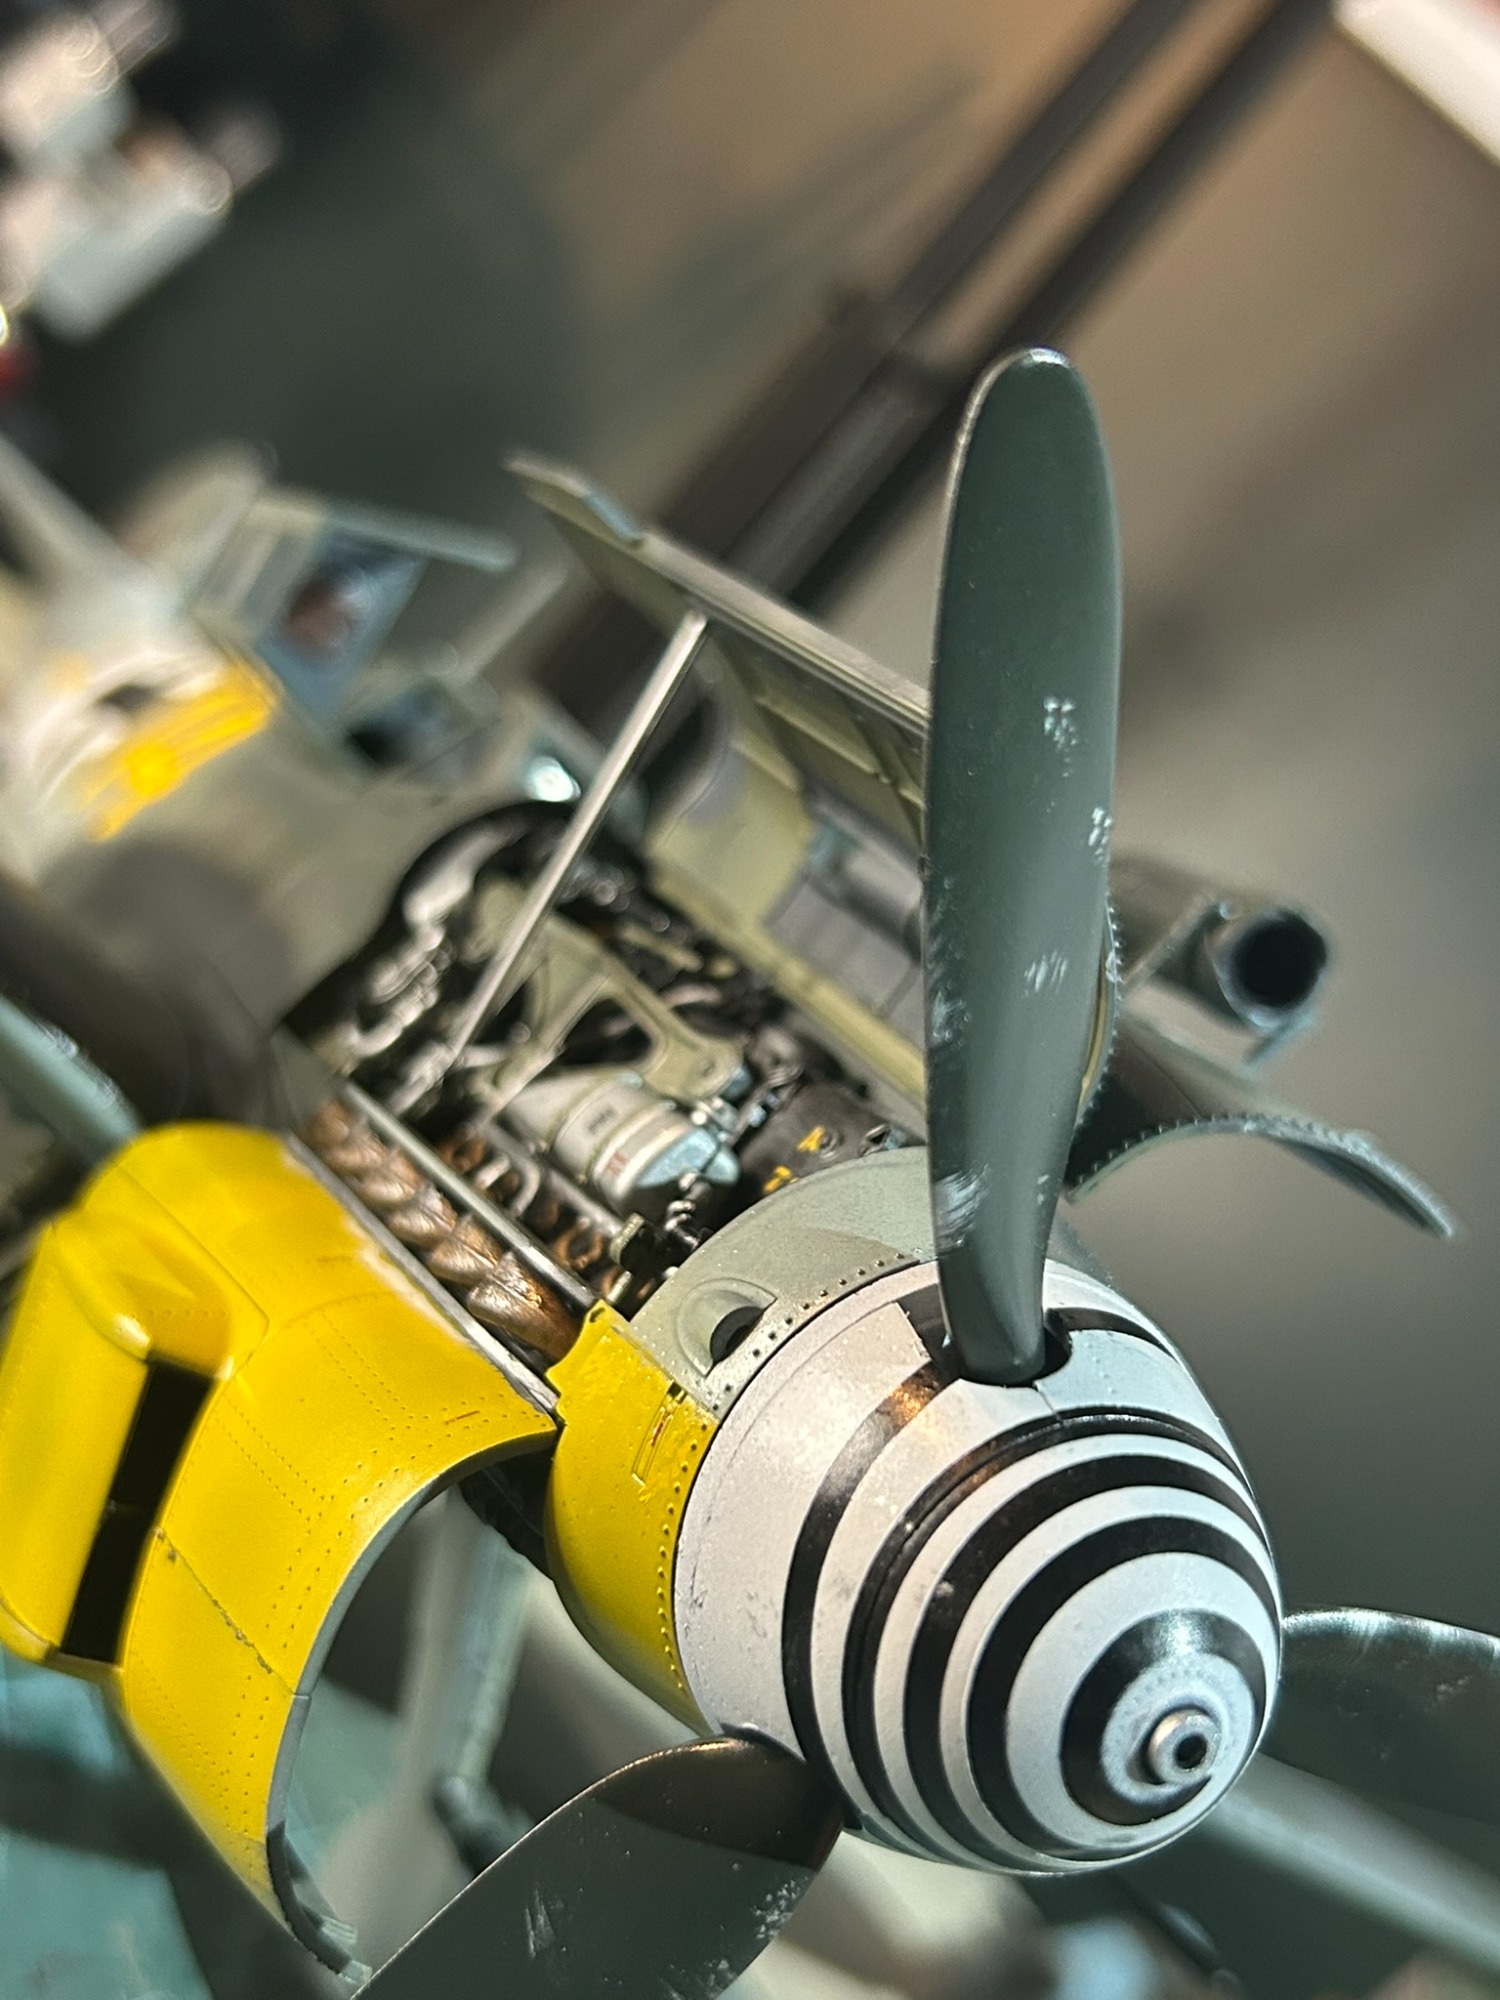
The build starts with the engine block, well technically it starts with the engine cowling! These two sides are painted as per Yellow 14 (Scheme A) camo scheme.
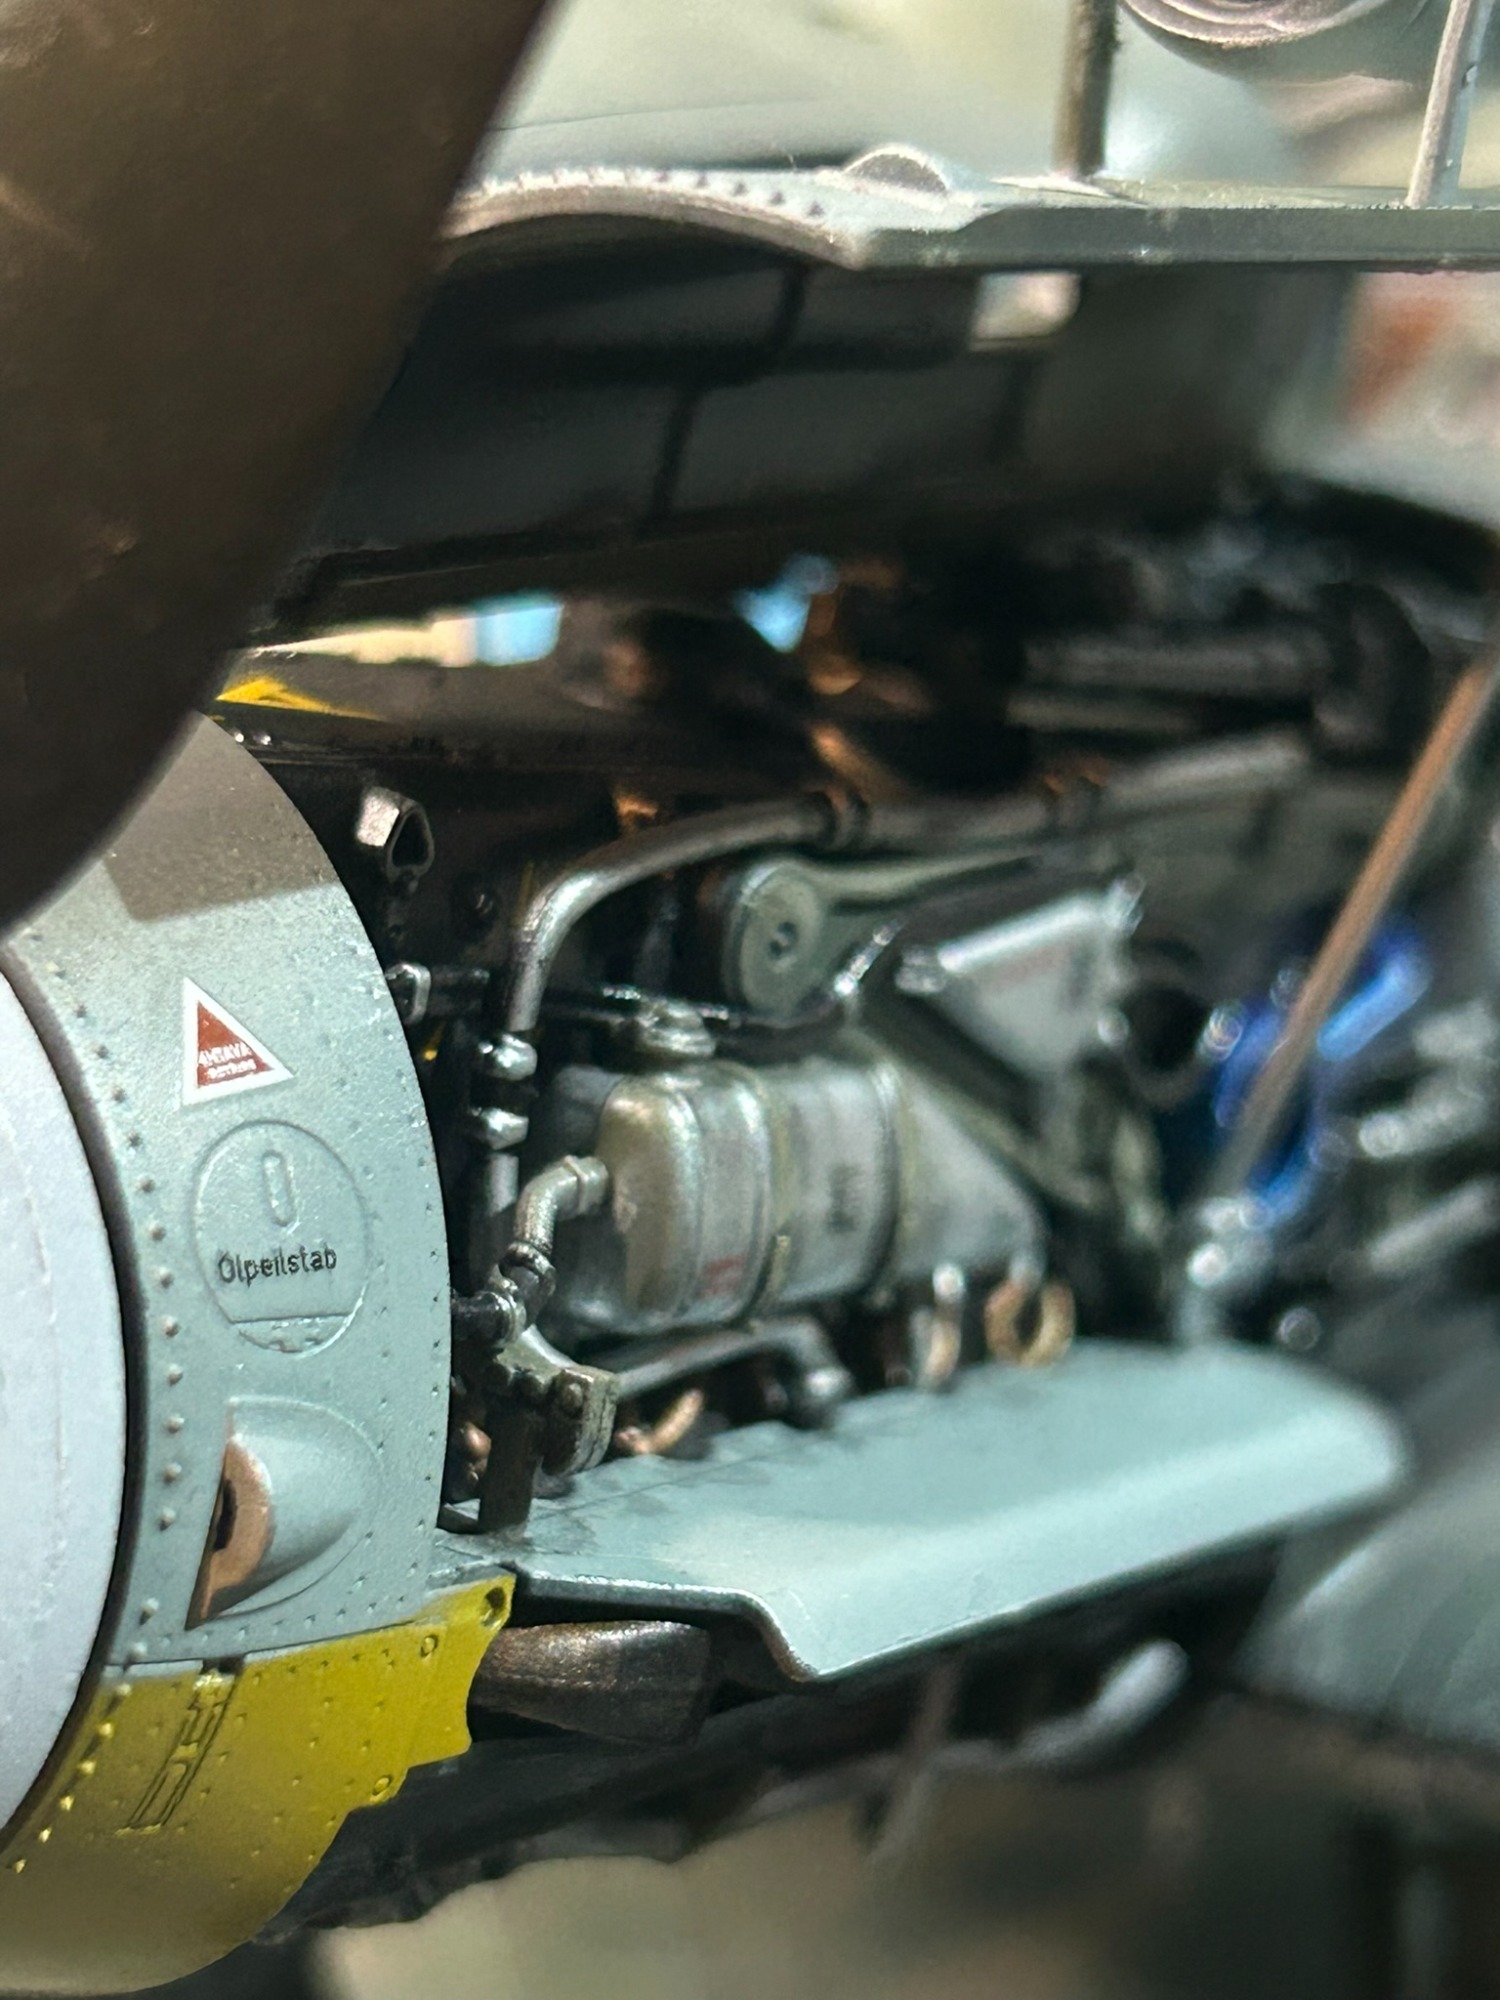
Engine Block Start
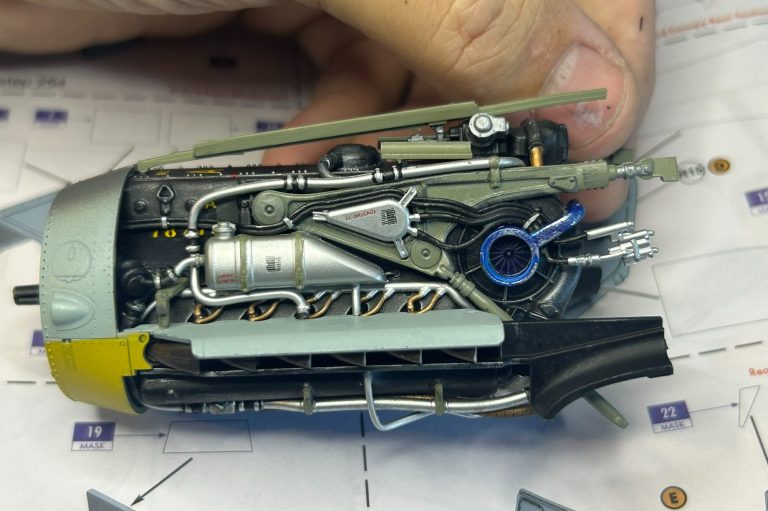
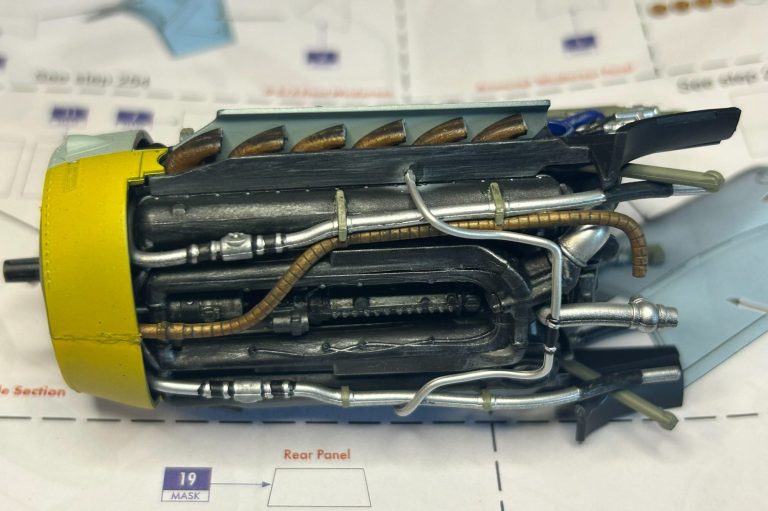
The kit starts with the construciton of the engine. There has to be 50+ parts and it took me about 8 hours to cut, prime, paint, decals and weather! But what detail it has. The bigger scale is fantastic, being able to paint individual parts vs a single block lump the likes of which we see in 1:72 scale.

First sections
The first 4-5 parts glued, painted and dry brushed with aluminium to give it a worn/weathered look.
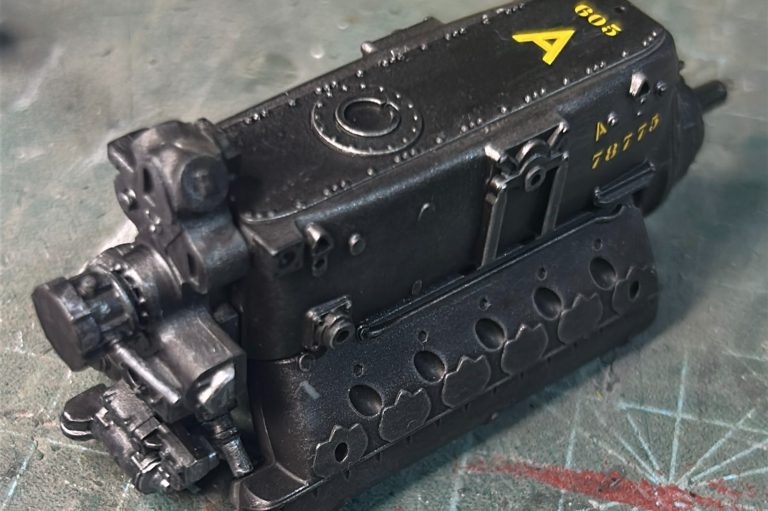
First decals on
A few more parts added and painted. At this point we need to add the first decals. Before long these will be part hidden and as such inaccessible. The yellow jumps out from the black base.
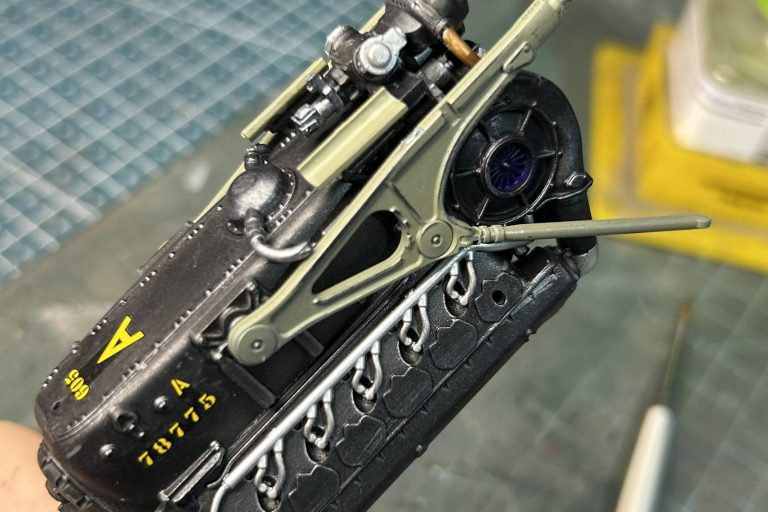
Engine mount on.
Change of colour in the airbrush, engine mounts added with gun rests on the top of the engine.
Exhausting
Exhaust ports added, pipes, and tubes sticking all over!
Yellow nose.
The BF109 is famous for it's yellow nose. As this is included in this scheme, I had to paint the front of the cowling the bright yellow and the Luftwaffe underside blue!
Finished
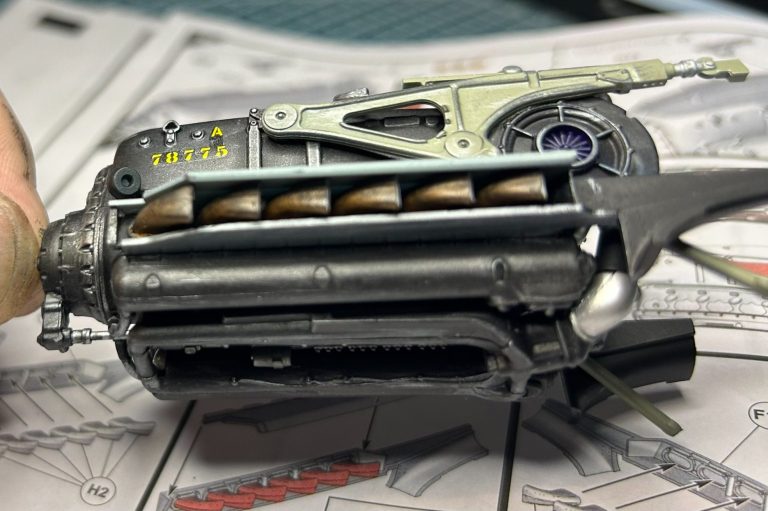
50 odd parts and 8 hours later, the engine is complete for this stage. The detail is incredible and justified the choice to build this kit with the cowlings open. You HAVE to be able to see this detail. Shame the cover wasn't hinged.
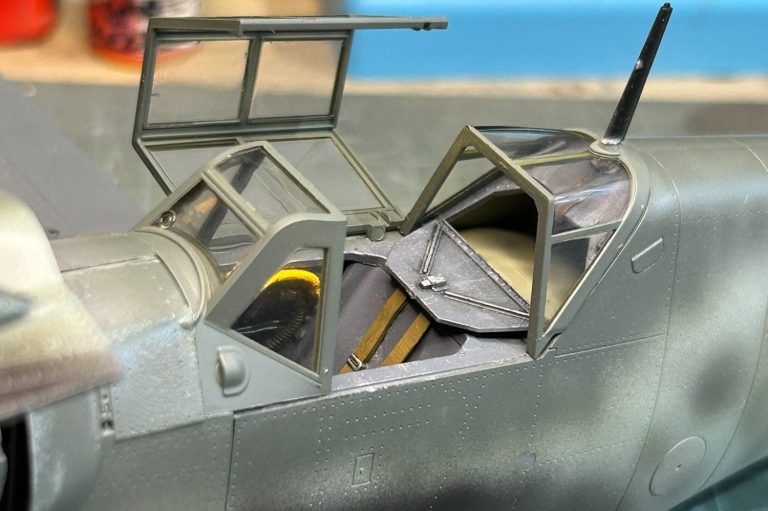
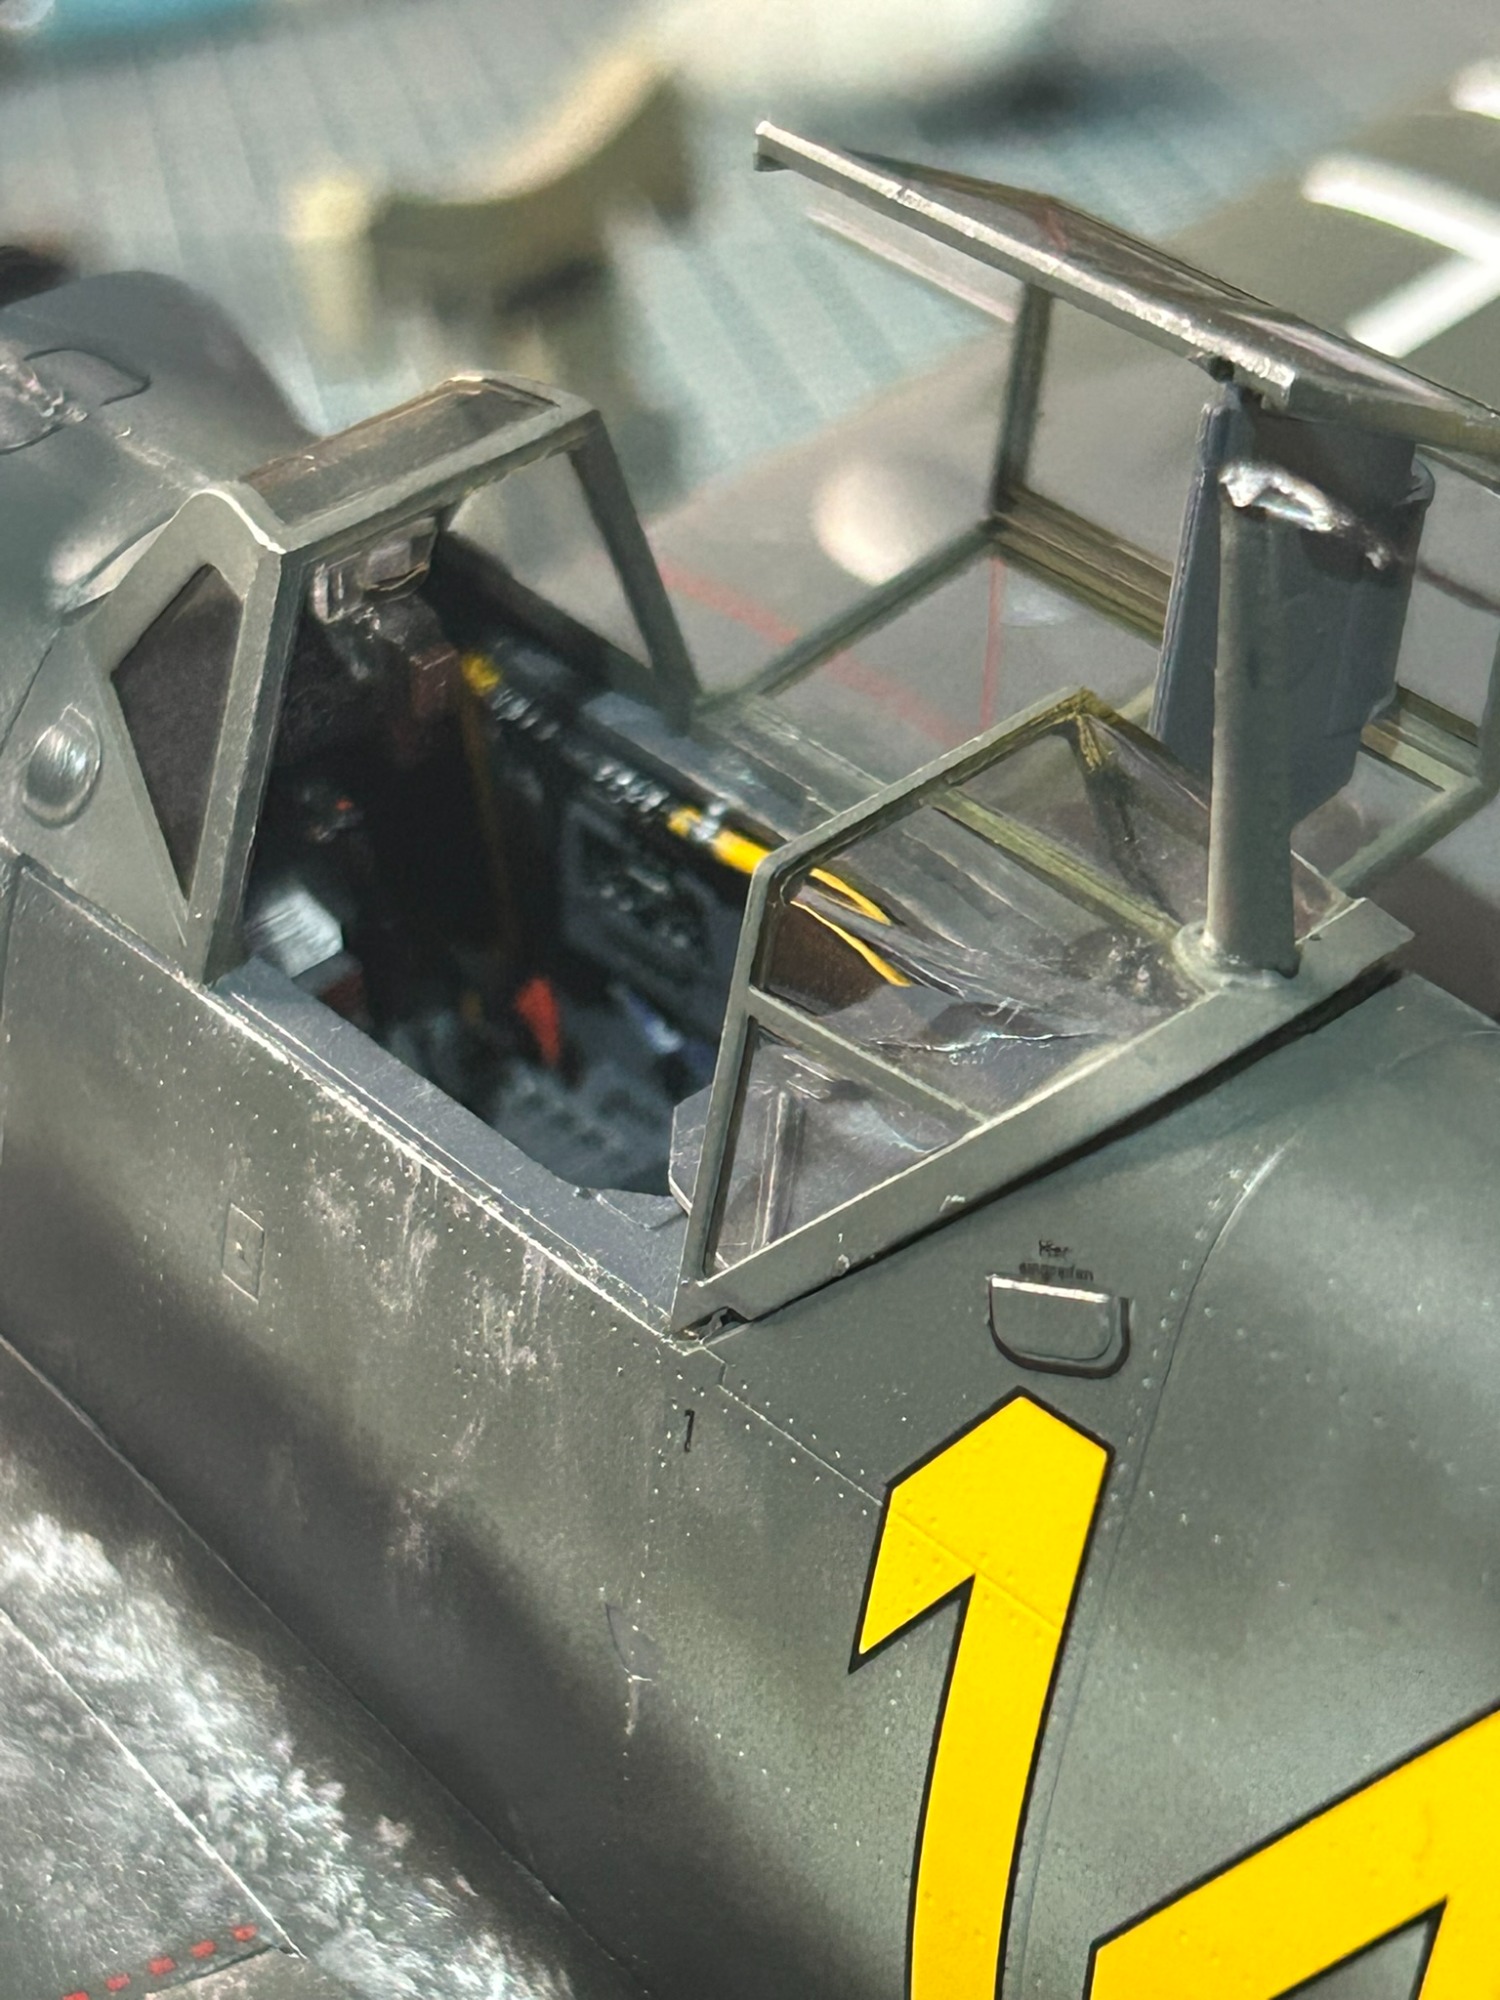
Day 2 - Cockpit & all it's components.
After the engine, the cockpit has the most detail. Again, with the 1:24 the level of detail is just WOW and justified the choice to have the cockpit canopy open. It also gives a chance to add some colour, and weathering brought about by pilot ware and tare.
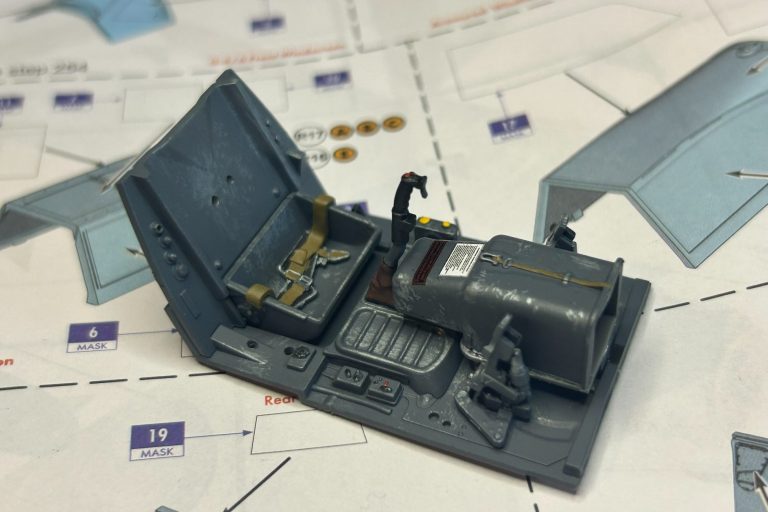
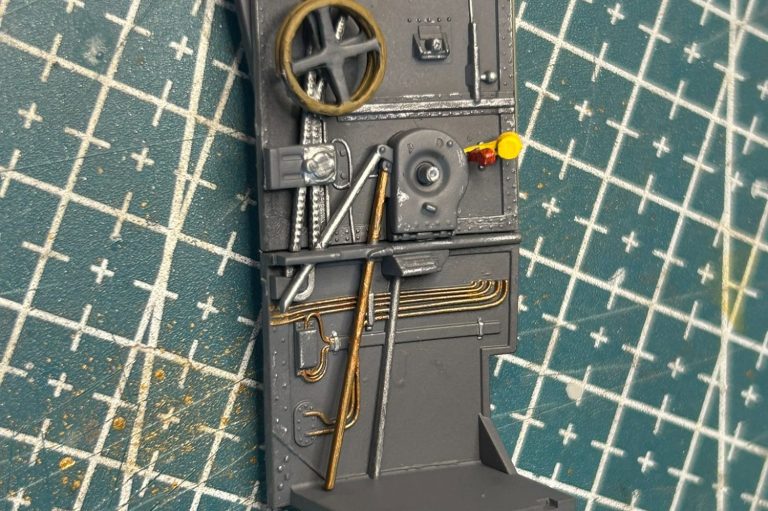
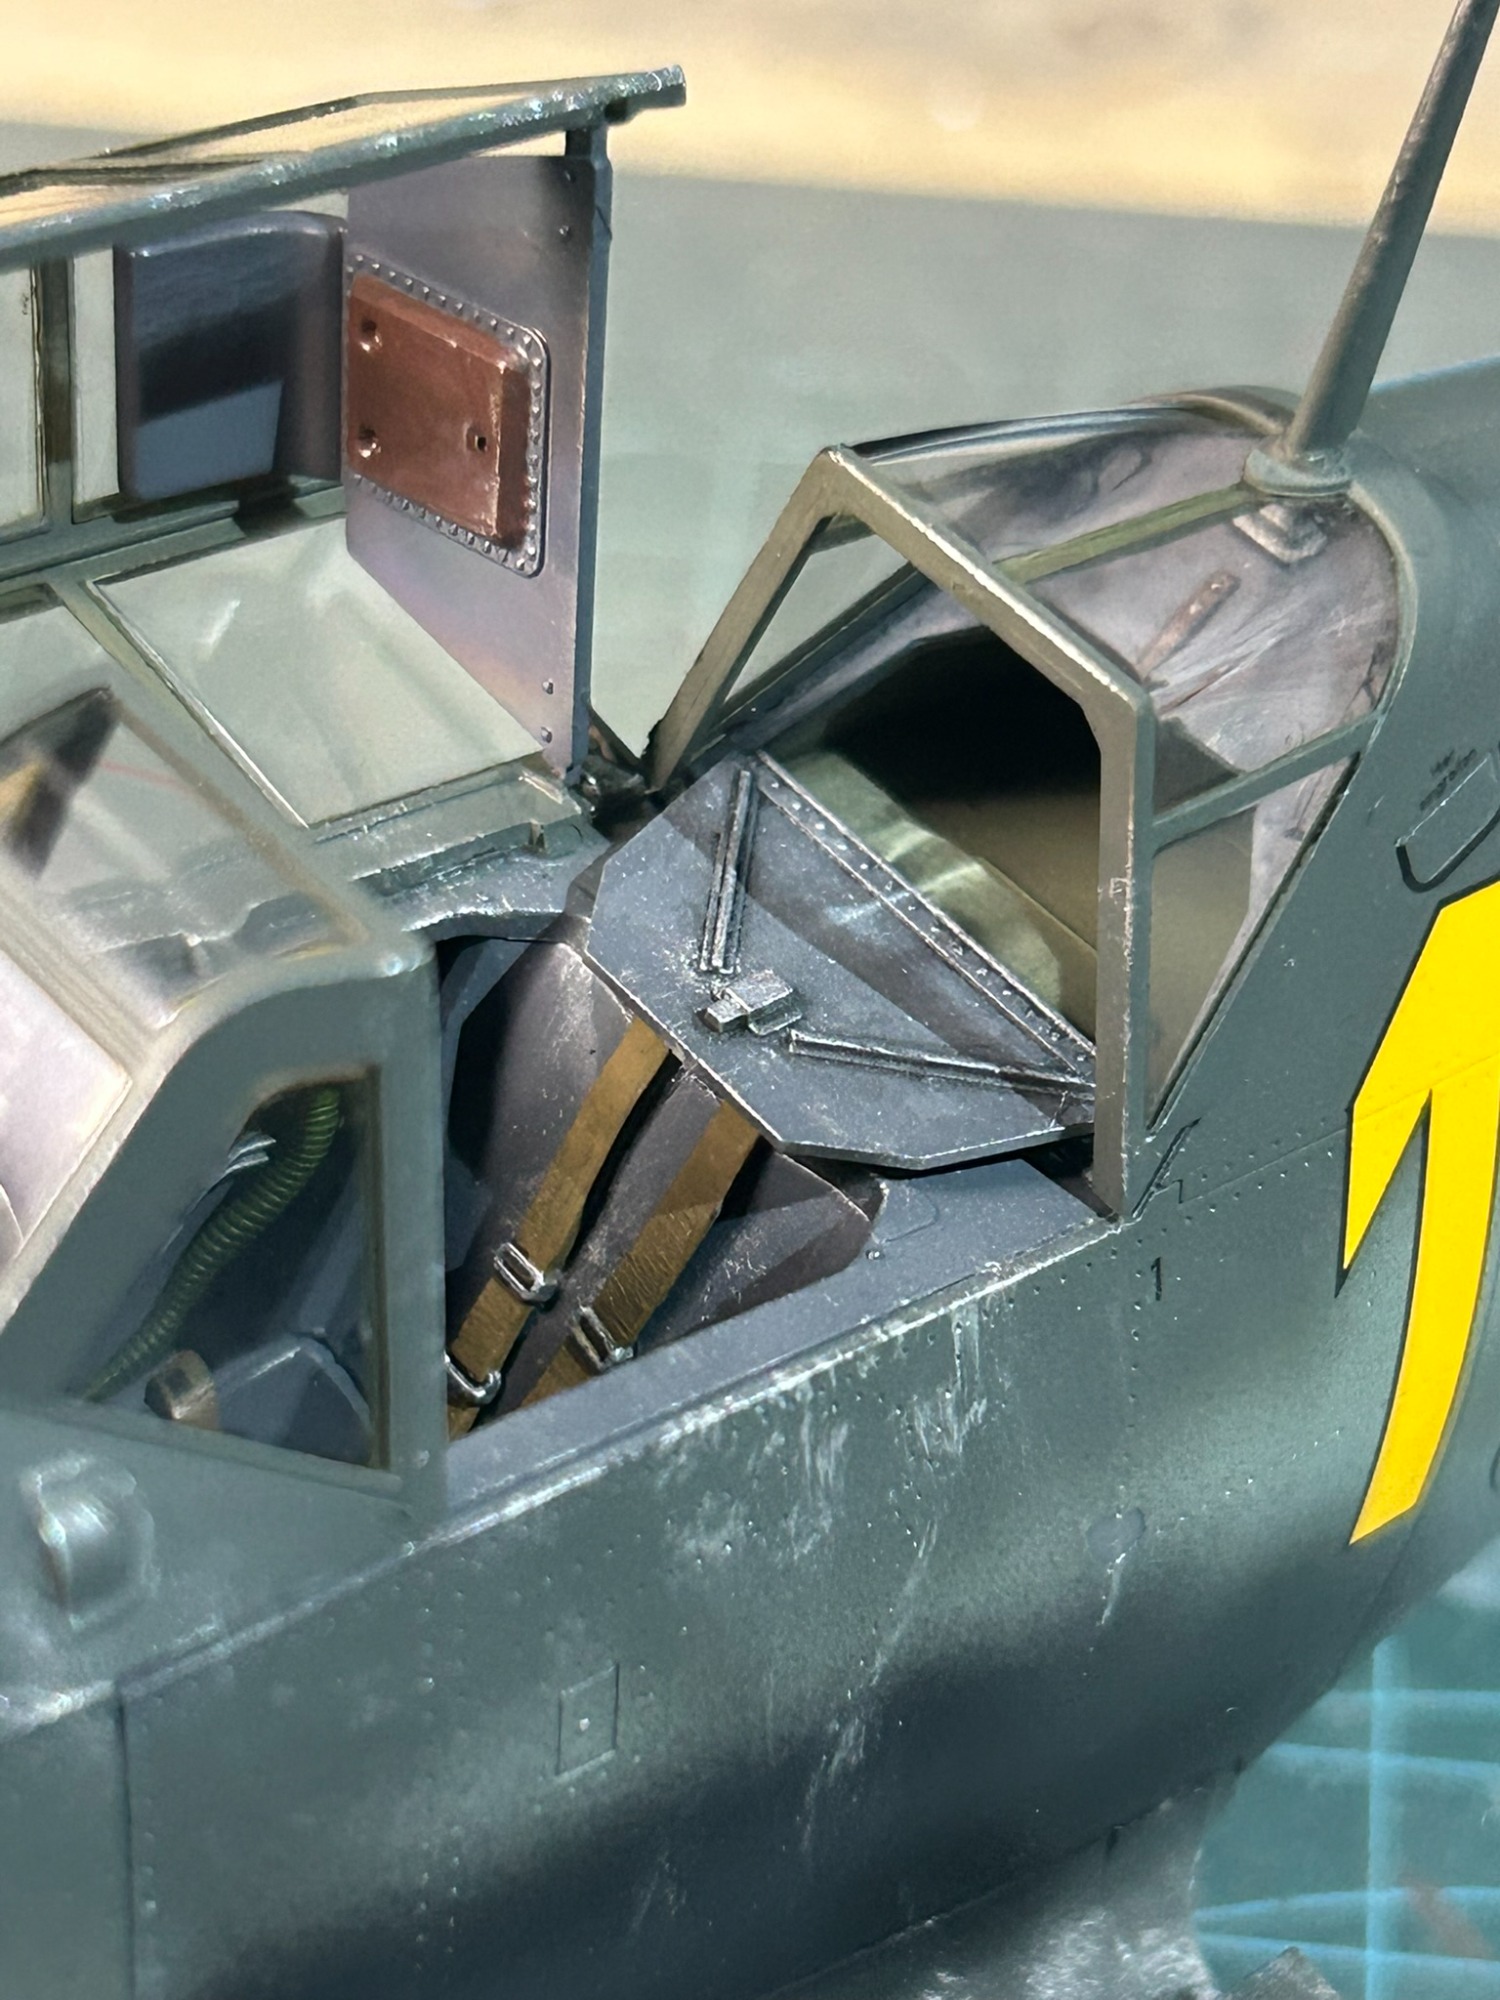
Seat, belts & peddles
The seatbelts are a nice touch and being able to paint the metalic parts helps them pop. I tried to add "scratches" on the metal surfaces to show where the boots and gloves might have left marks.
Decals
More decals on the cannon cover, all surfaces are airbrushed with Vallejo "Model Air" using the RLM references in the instructions.
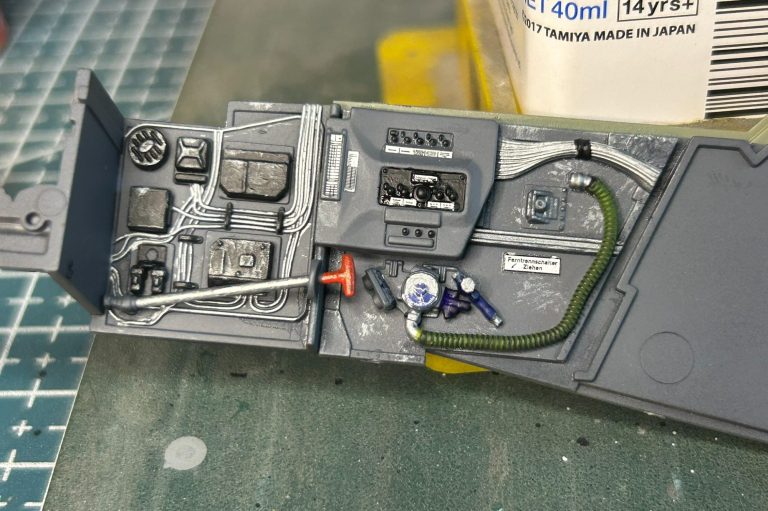
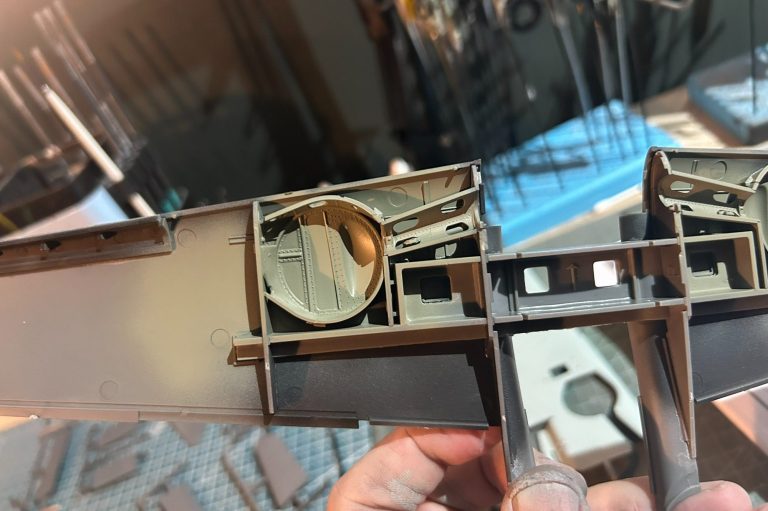
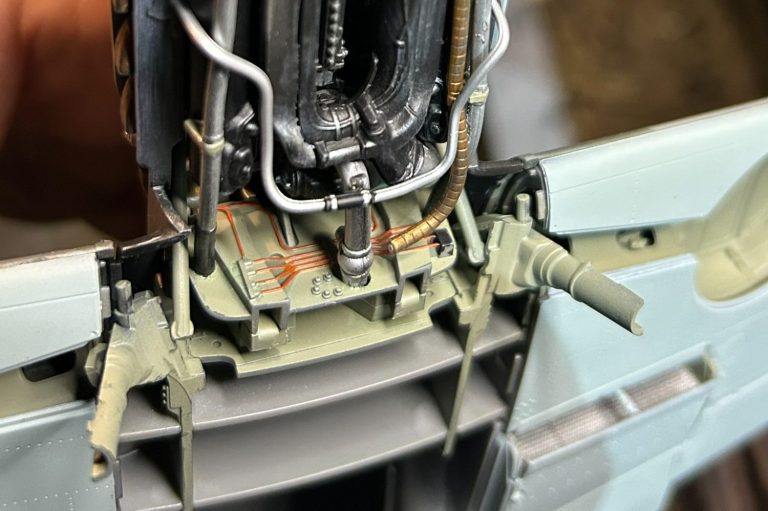
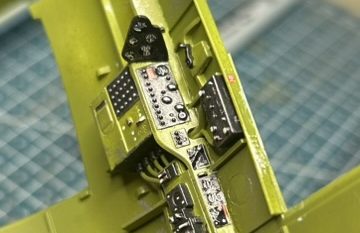
Cockpit side #1
Here we see some of the insruments and indicators, along with wiring. Its so much easier to paint a wire when it's 1mm vs 0.01mm in 1:72 scale!!
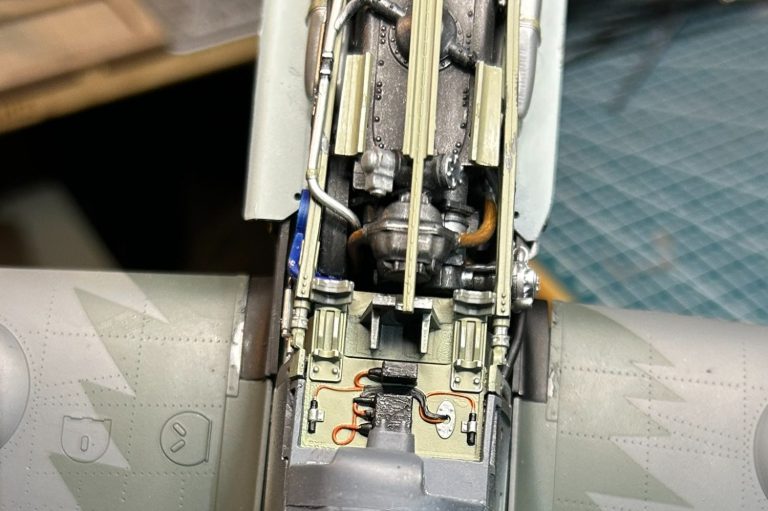
Cockpit side #2
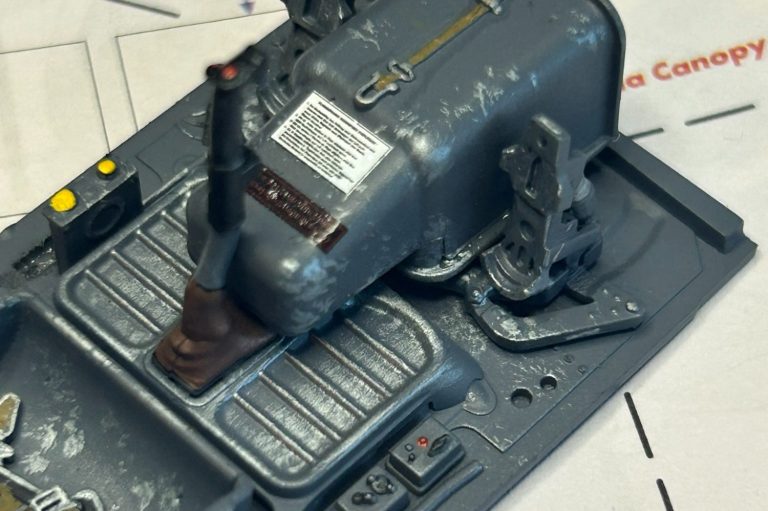
Trim wheel, throttle and all connecting chains and wires.
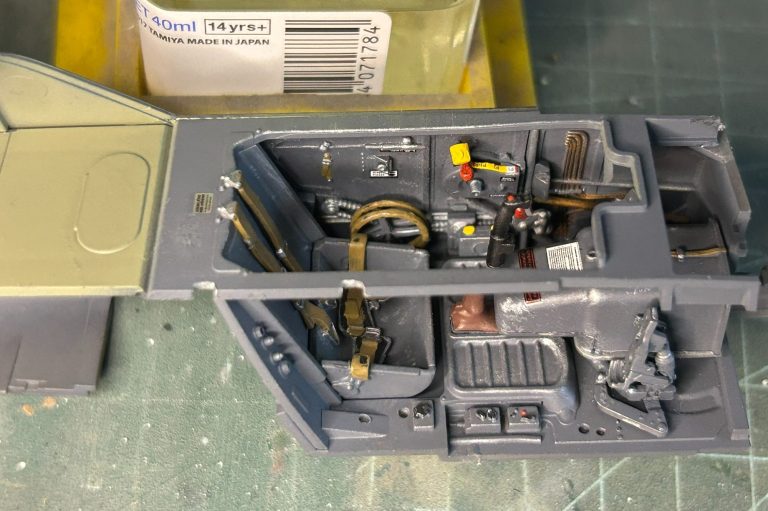
Cockpit build
First side added. Obviously these had to be painted and decals added before we encase them in the fuselage.
Done!
And that's the cockpit built, just need to add the instrument panel and we can cover it all up in the plane body.
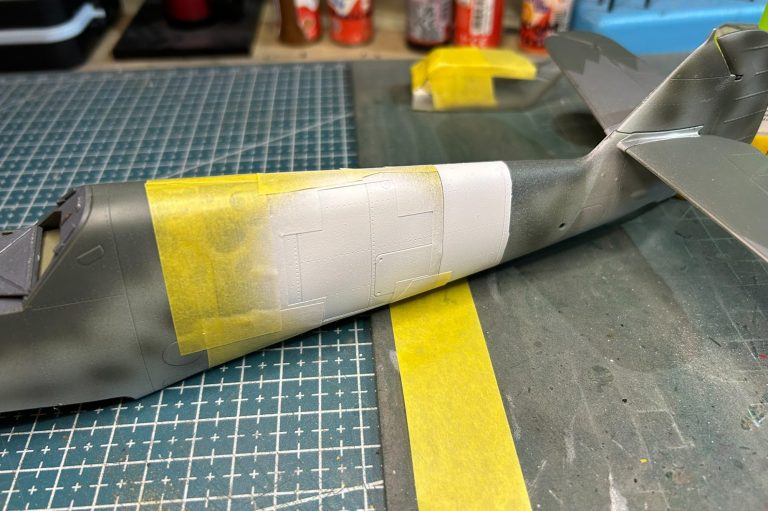
Fuselage Time
I find painting the fuselage and wings PRIOR to assembly easier than trying to mask up and paint once they assembled. I love the Luftwaffe camo schemes, unlike the RAF, the Luftwaffe pilots seem to have free reign to paint colours & pattens as they like.
2 Halves make a whole
Simple part of putting the two fuselage halves together around the cockpit cage built in the previous step.
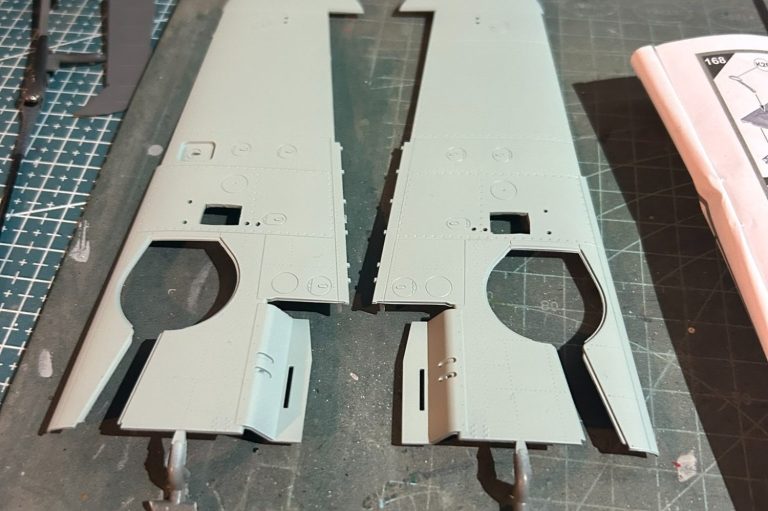
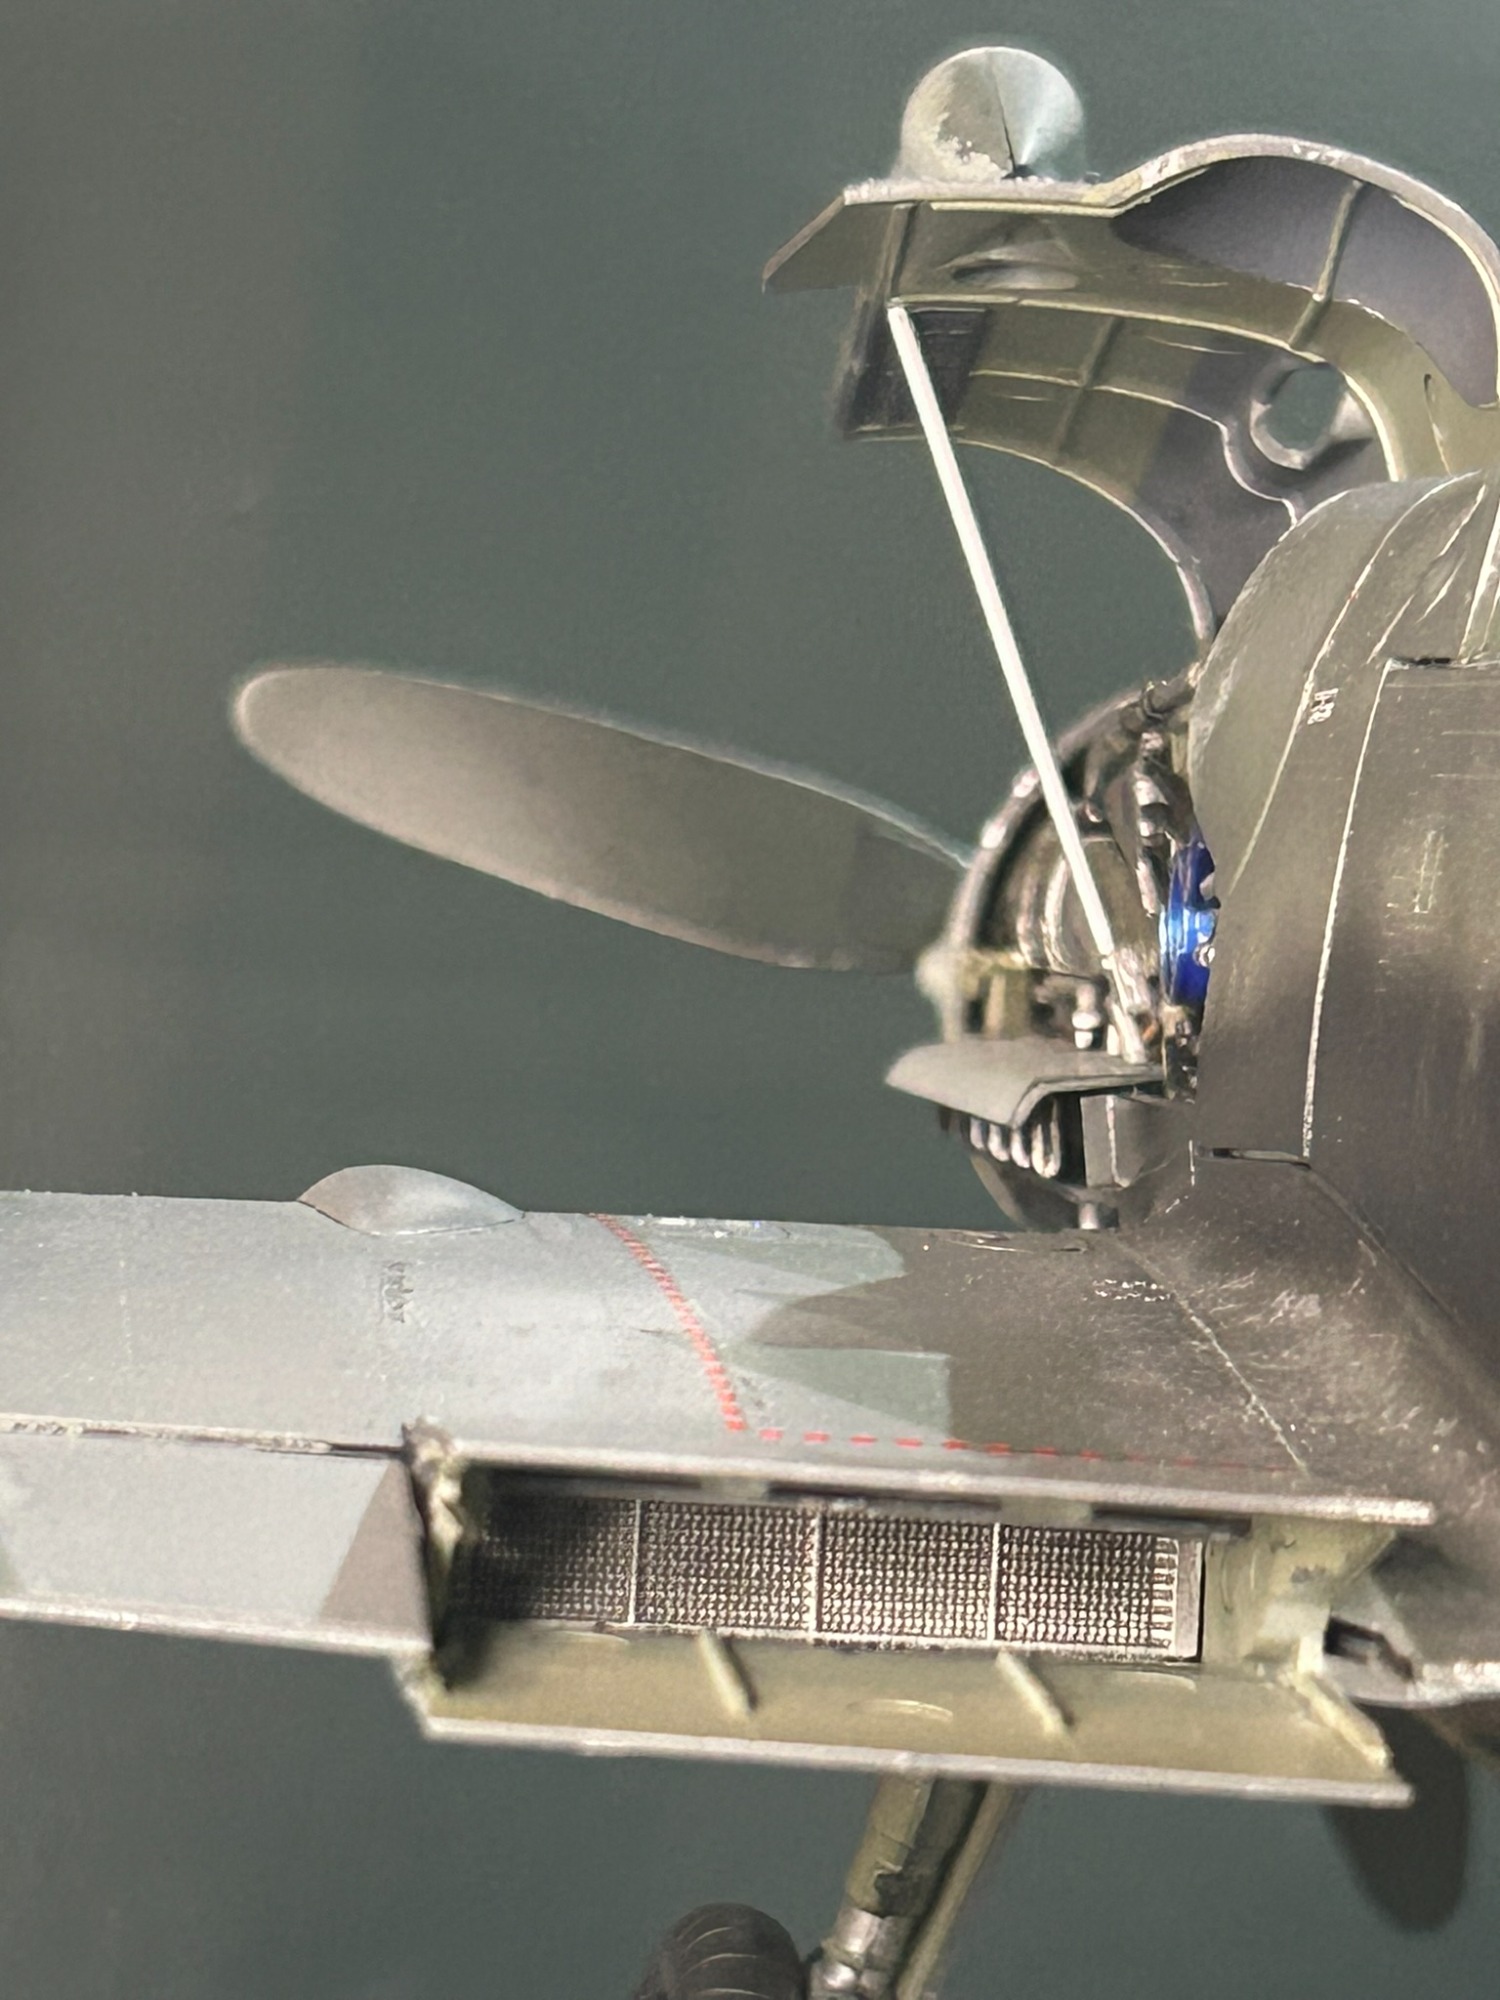
Wings underside
Simple prime and blue paint.
Wings topside
The topside includes the wheel-bay. Simple enough construction. Painted with the interior green. Topside has an interesting paint scheme. I actually painted it twice because I wasnt happy with the blue wave.
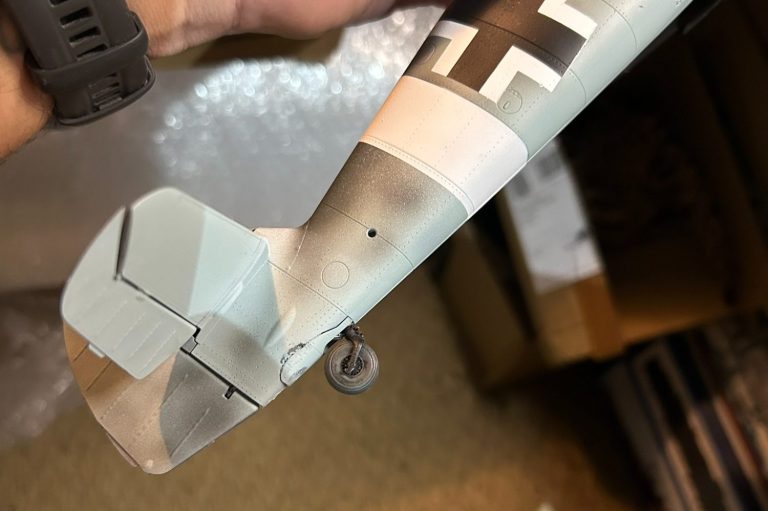
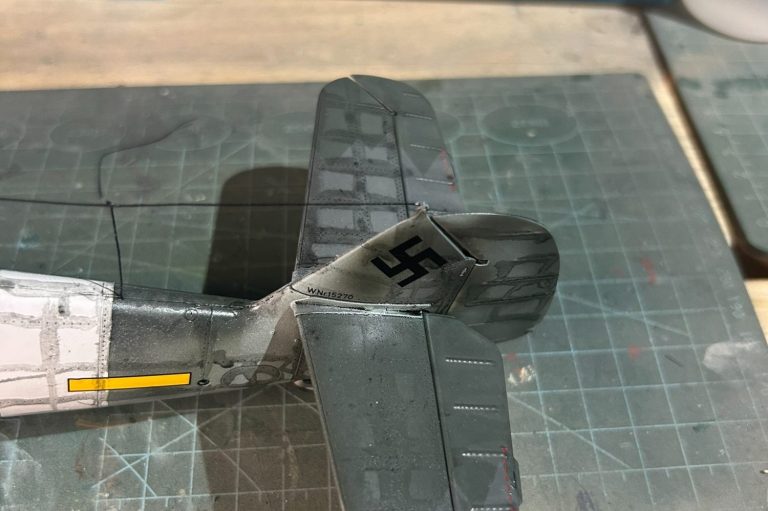
Tail Band
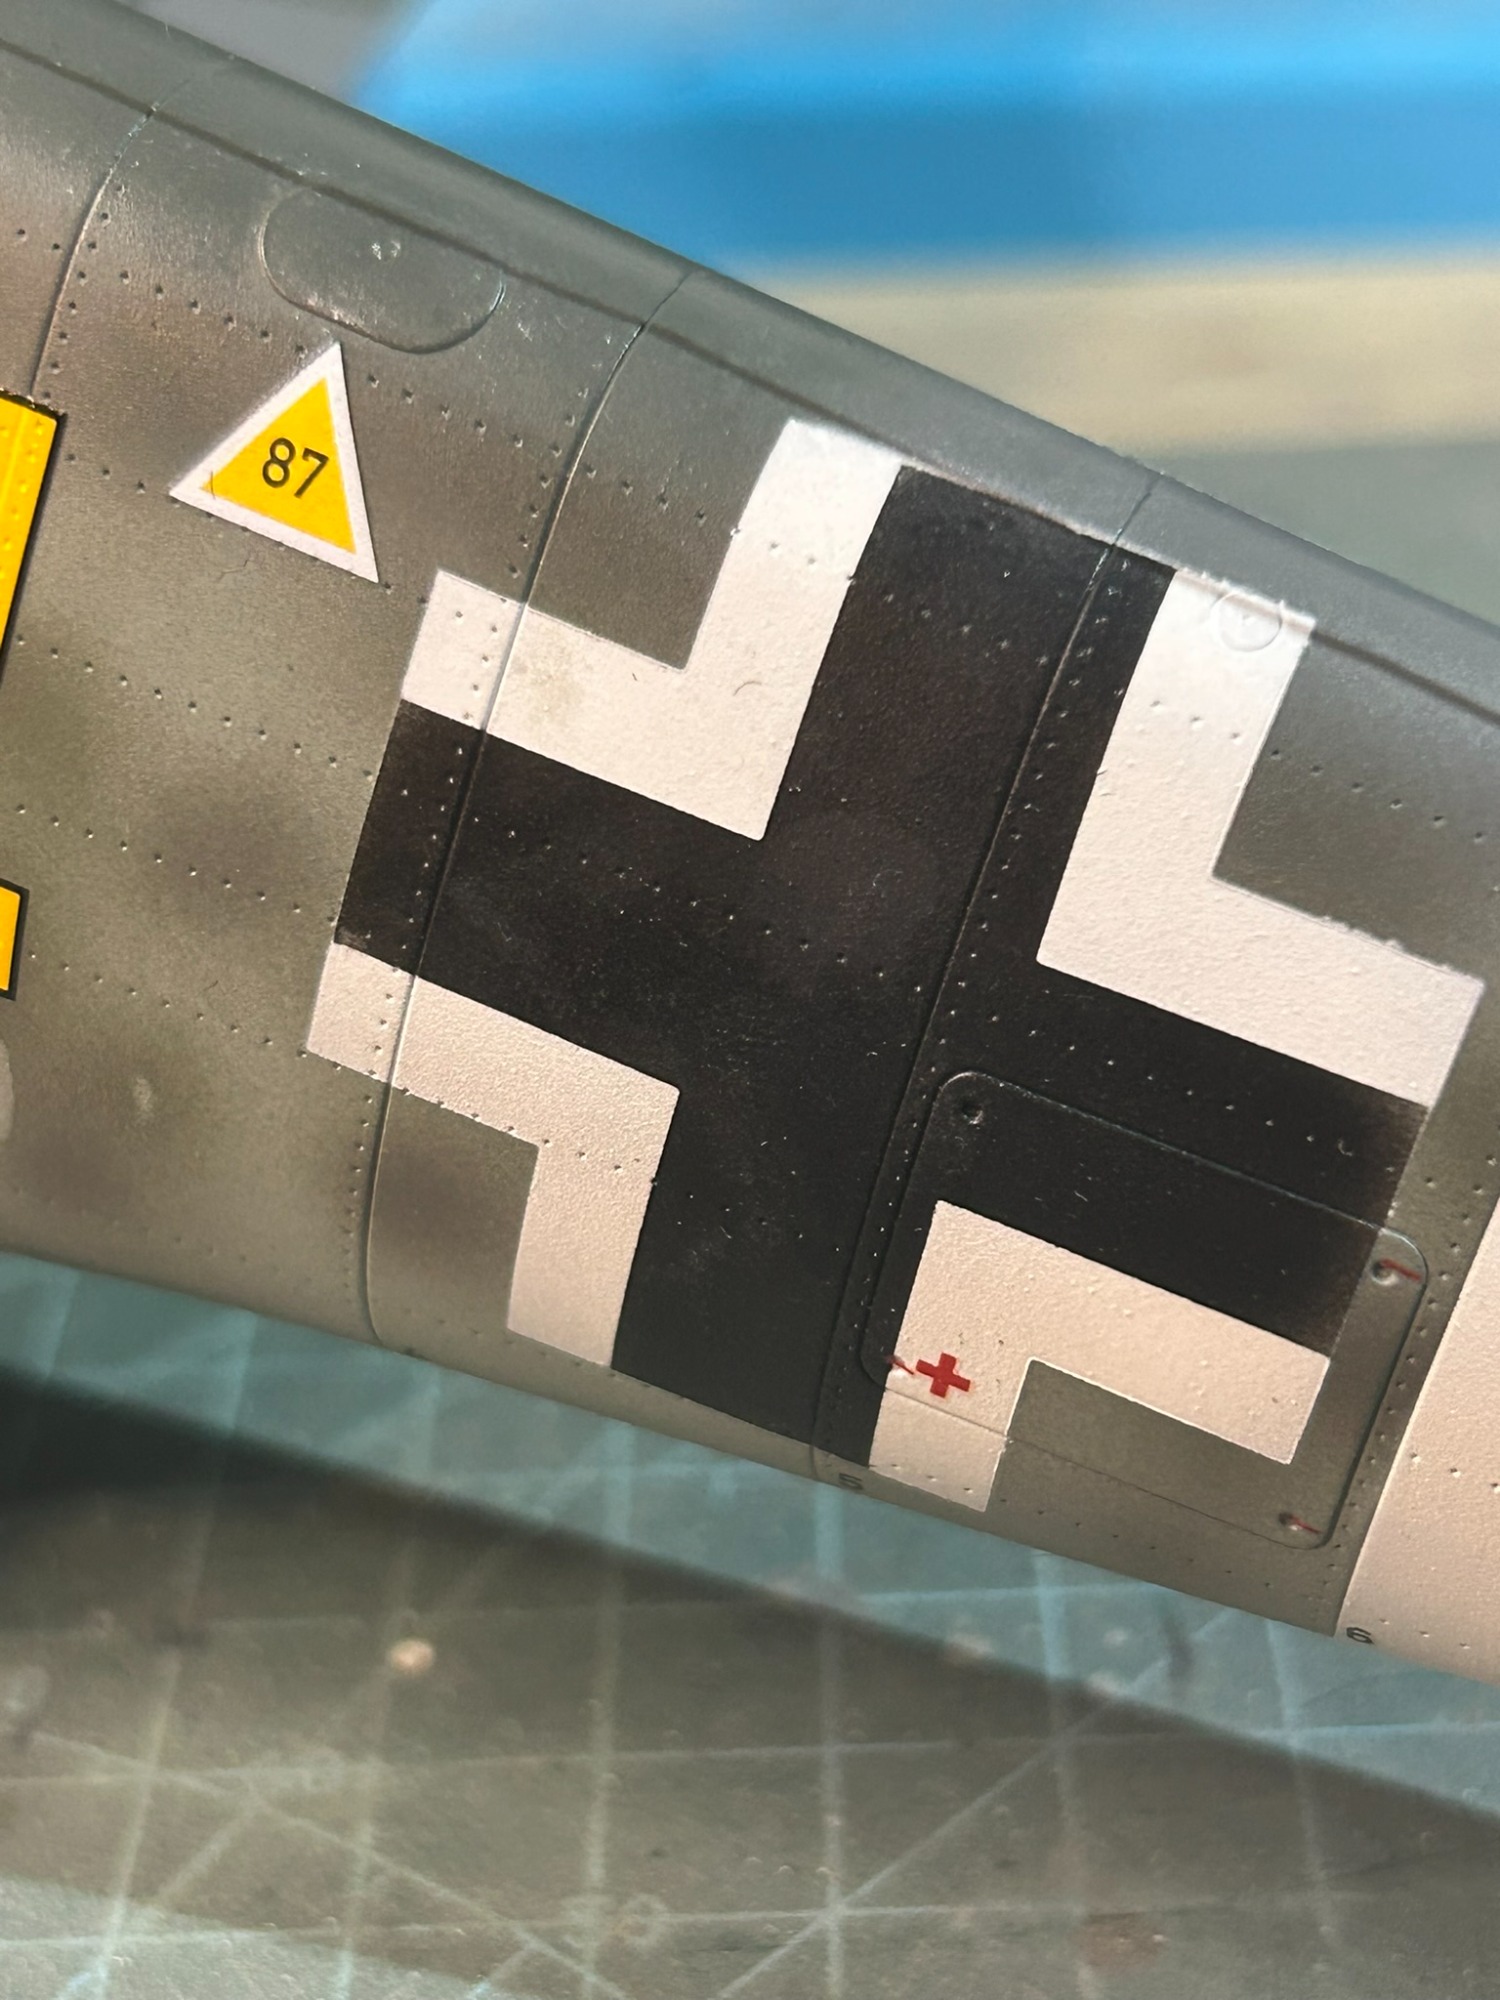
Nice clean lines for the white tail band. Looks much better than a decal. Also using the provided mask to paint the black cross.
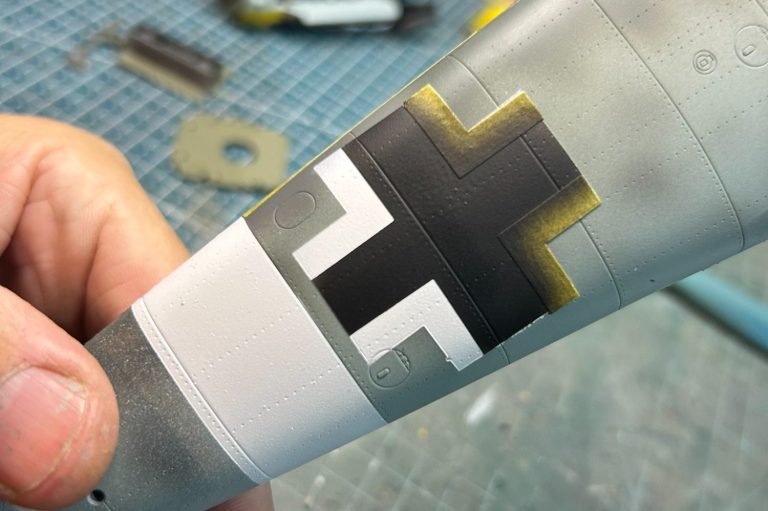
Black Cross
First time using stensils for the cross. Again, the paint finish is far more real life than a decal. I love the look, I may have to start doing this in the smaller scales.
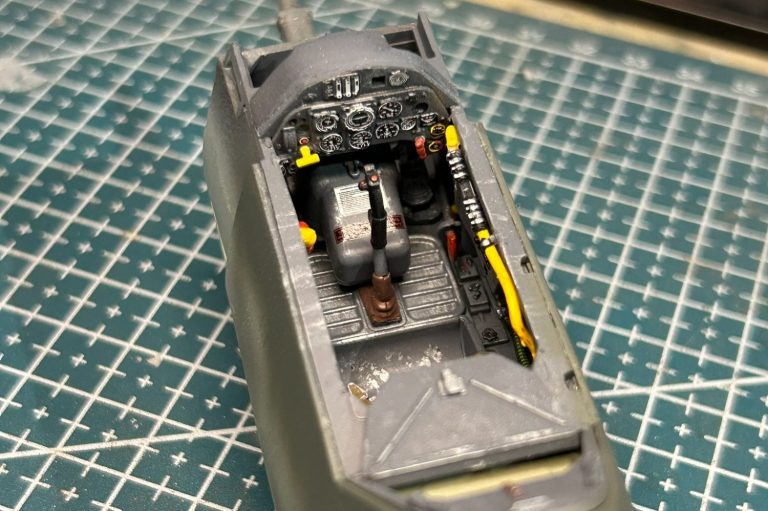
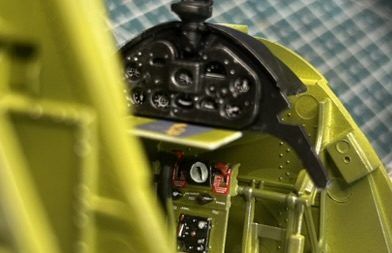
Instumental
Instrument panel in. I normally would go with photo etch, but the details of the decals at this scale looked much better. Plus the photo etch had to come from the US and would take weeks!!!
Day 3
After another 8-10 hours building and painting, the wings & fuselage were done and ready to join. But first.... get that engine on!!
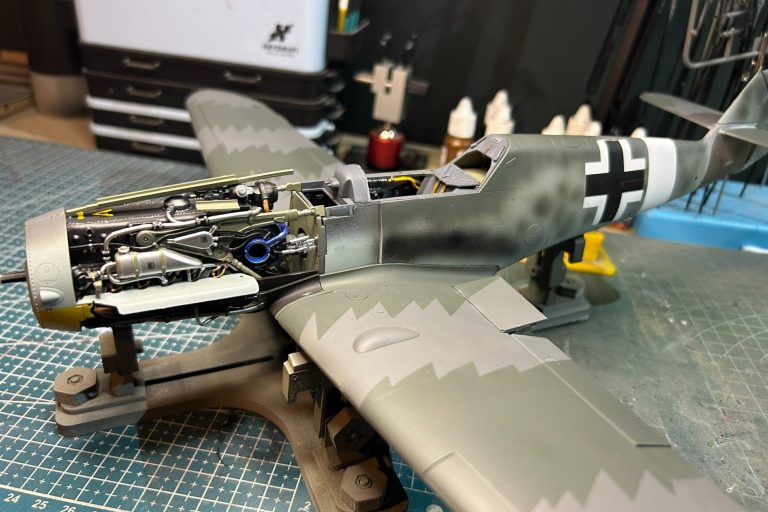
She's growing
Wings joined to the fuselage and engine mounted. The fit was pretty good, the firewall etc all went on well, and the 5-6 points of contact were all spot on.
Big bird
I wasn't prepared for how big a 1:24 kit is. I've build 100's of 1:72 and around 100 1:48, but this took me by suprise. The "jaggy" camo for scheme A clearer on the wing surface.

Exhausted
You can see I also added some heavy exhaust staining. You have to do it on 3 different panels to ensure it all lines up!
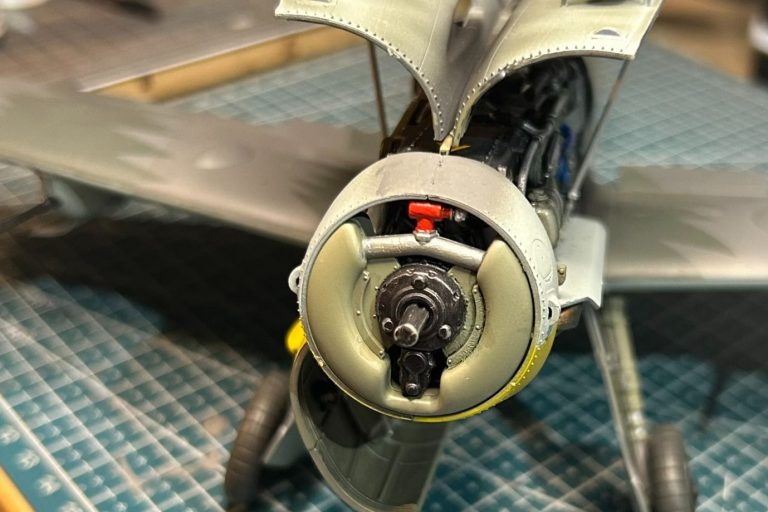
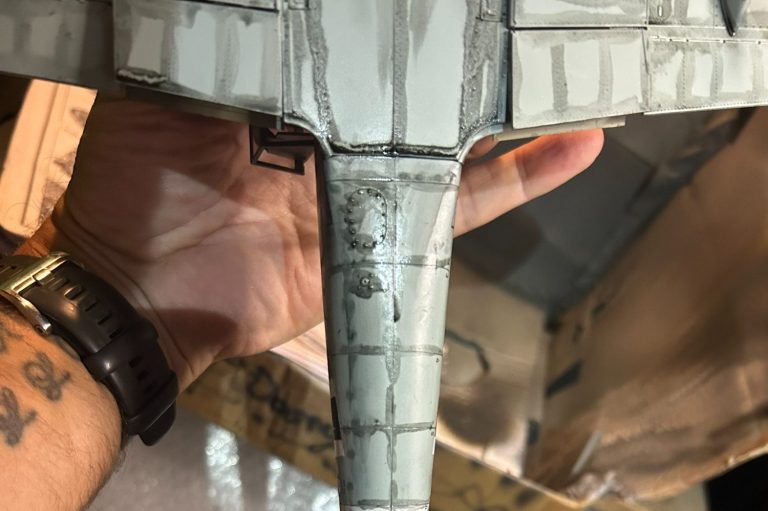
Little legs
Underside of the engine and wheel wells, clearly showing the stubs of the wheel struts.
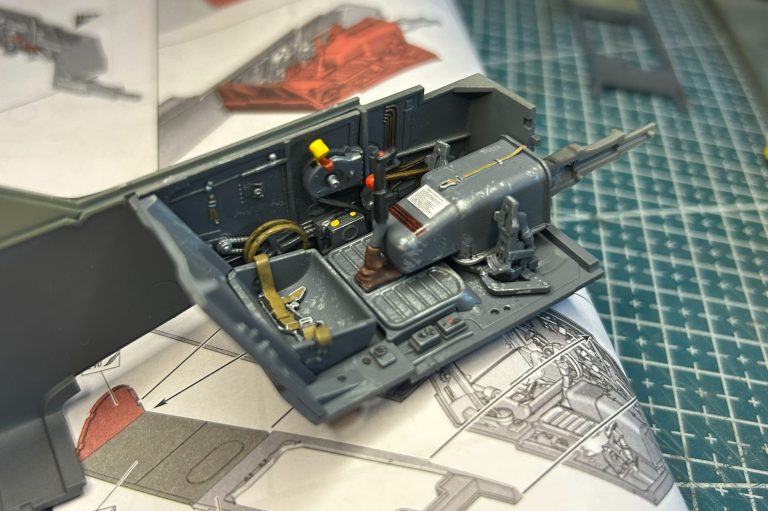
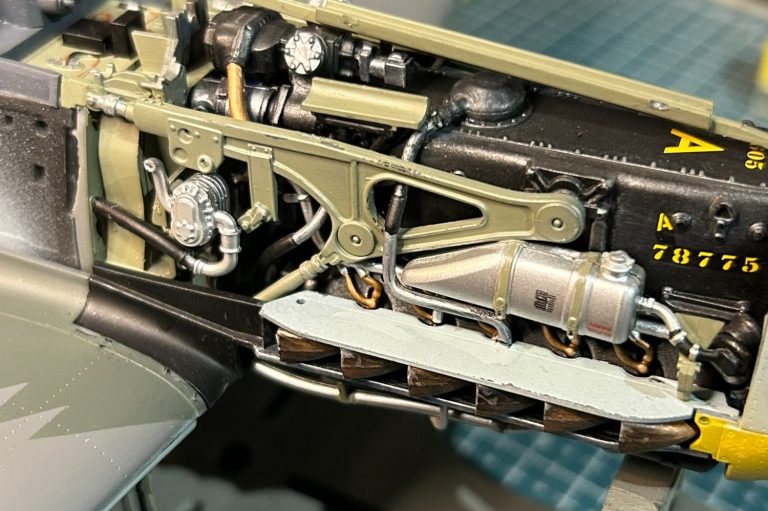
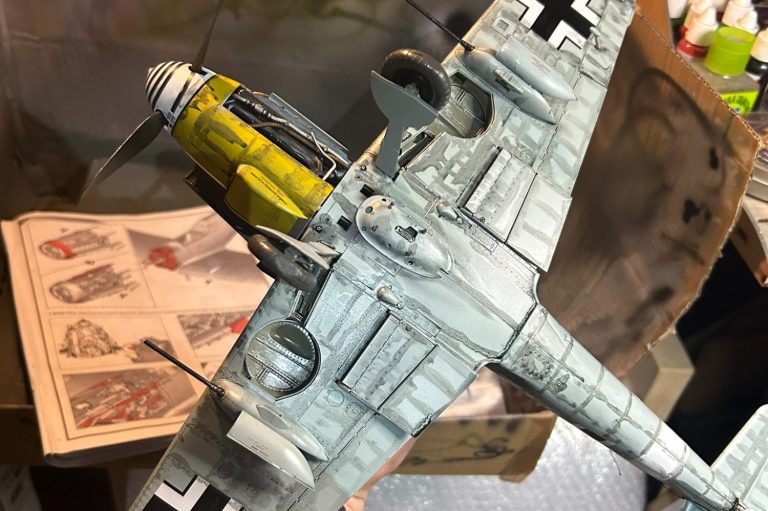
Ready for guns
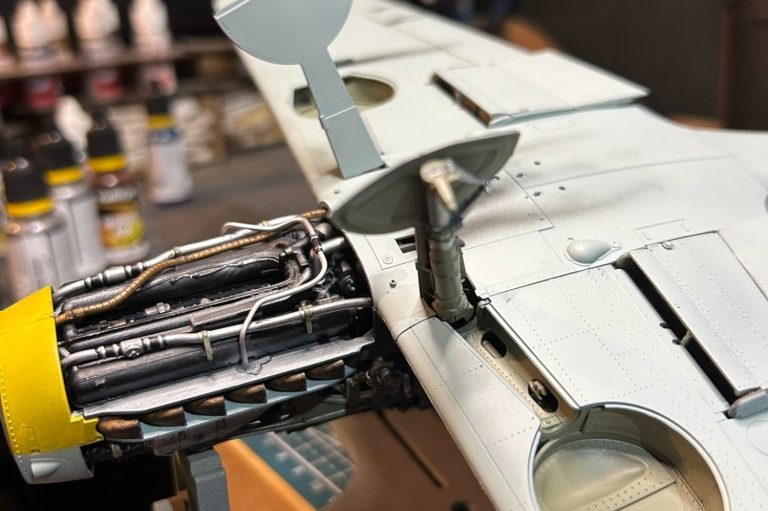
Top down view of the engine and the gun mounts. Love the details of the wiring and bottles etc.
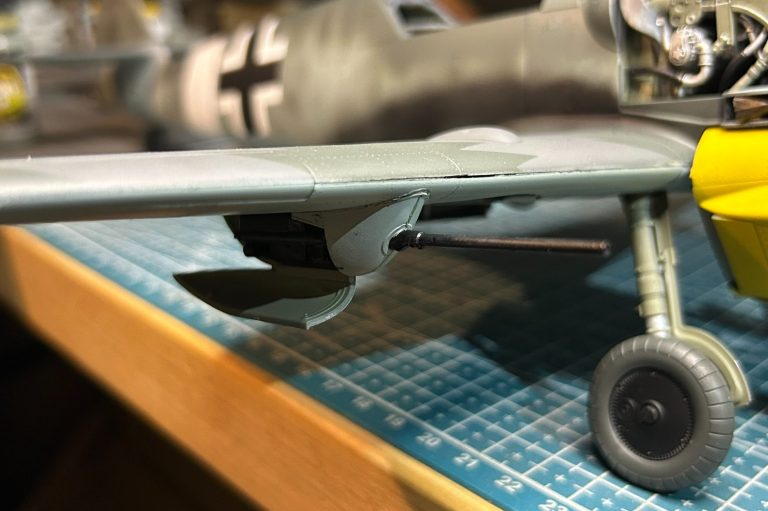
Nice fit.
Very happy with the nice tight fit of the engine housing and the leading edge of the wing. I SHOULD have painted that before mouting....dang it.
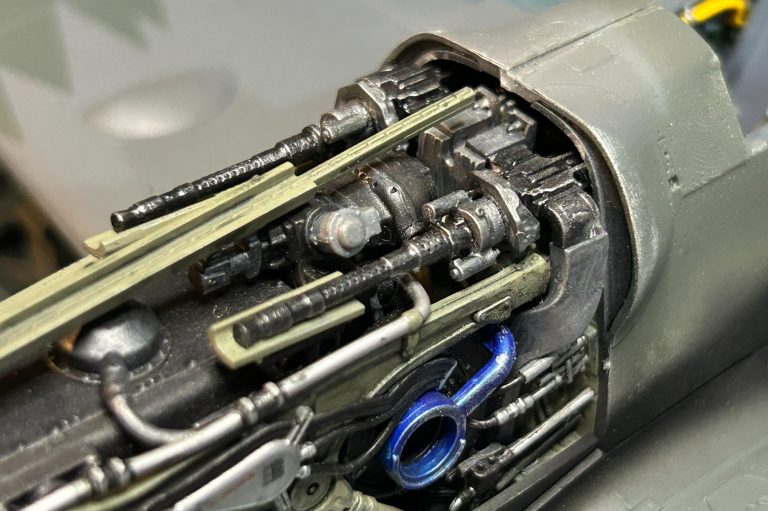
Guns and Oil Cooler Cover
Time to add the machine guns to the nose, and start to add some of the external covers that will hang or be pinned open.

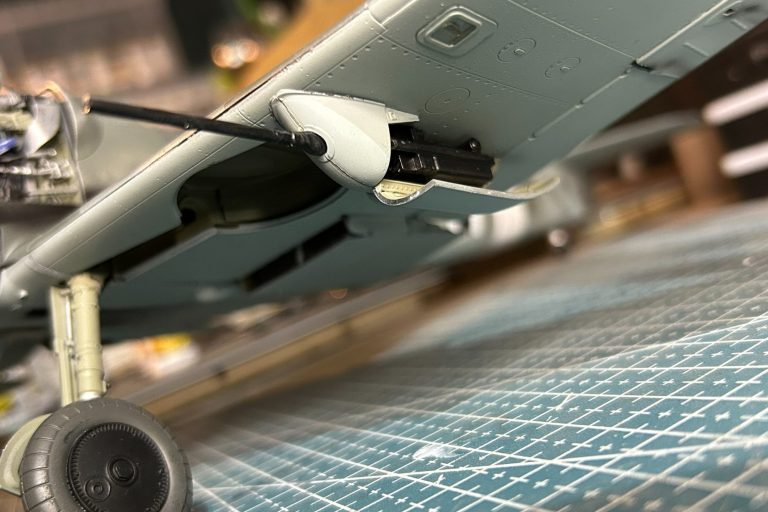
Guns & Cartridges
Adding on the two main machine guns and the respective cartridge chutes, which let gravity guide the spend casings through holes in the underside of the fuselage.
Bang
The two guns are side by side (Not off set) in this version of the 109. It did have me checking examples online!
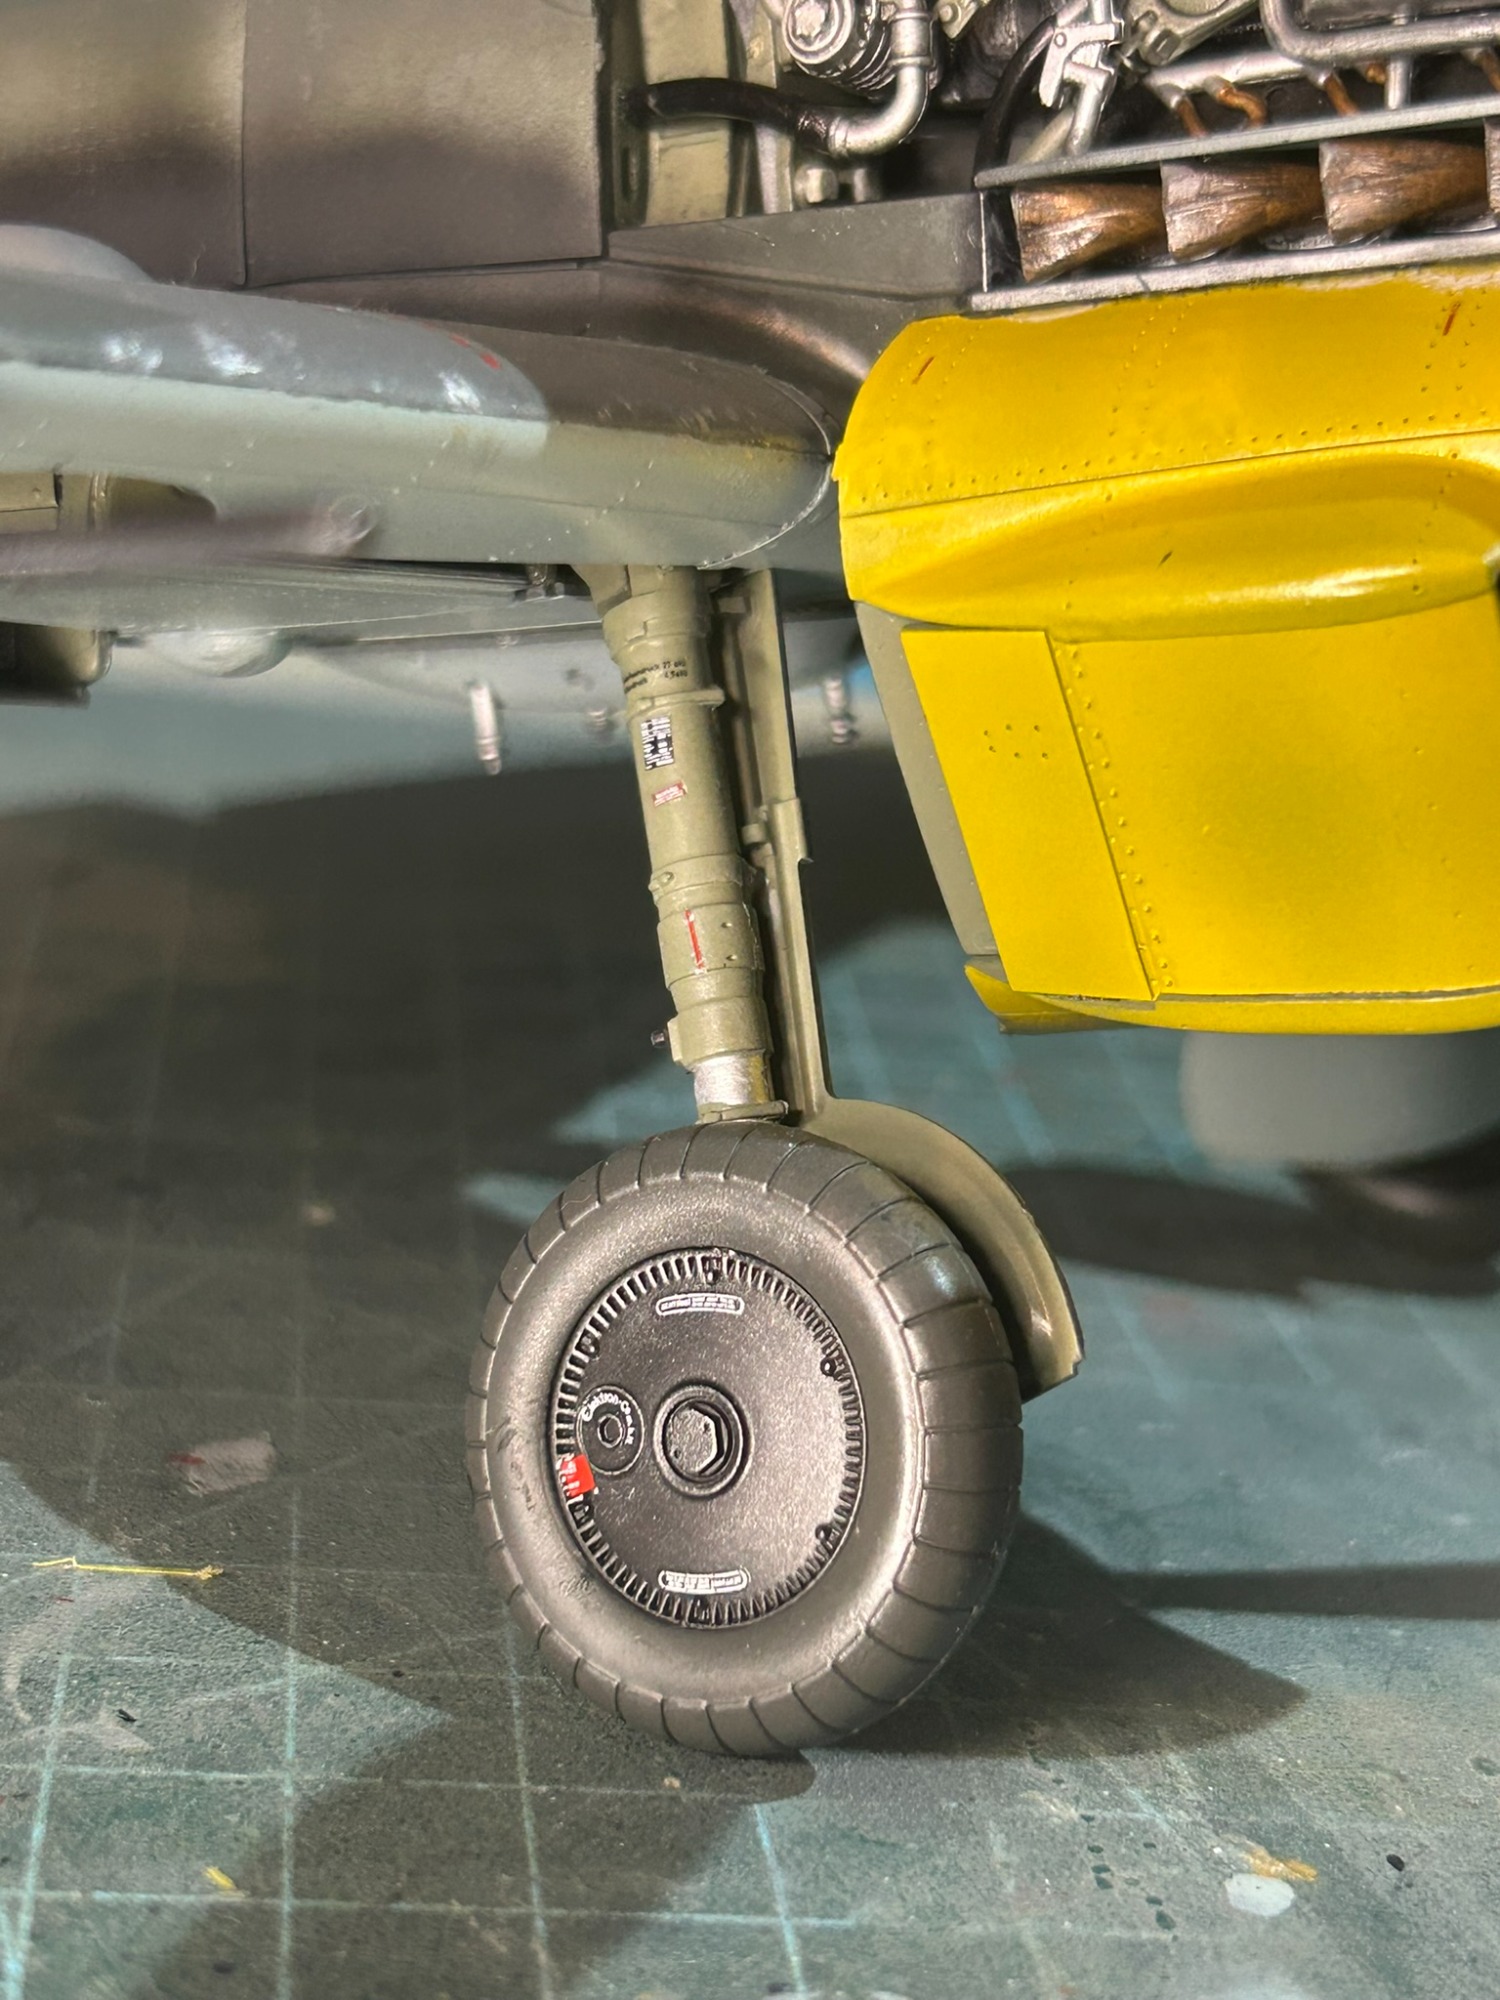
Wheely good
Wheels down, struts and covers on.
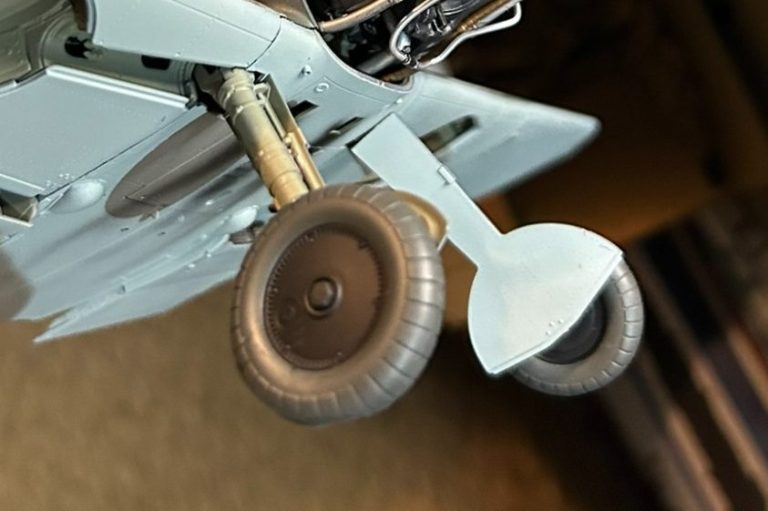
Tyre-ing
Wheels and tyres on. Shes got legs now!!
Rear wheel
Tail wheel added also. She can stand on her own two (three?) feet now.
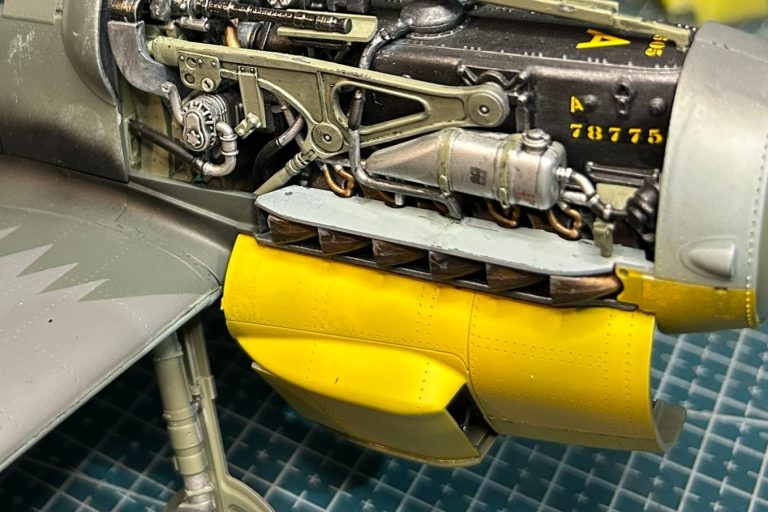
Oil cooler cover.
Another pop of yellow as the oil coolant cover is added, hanging on!!
Day 4 End of the beginning
The next phase of the build will close the construciton part. We add gun pods, engine cowling (remember those) and cockpit canopy/
Gun-pods
Each of the wings has a gun pod slung under, both of which are open with the machine gun visible inside.
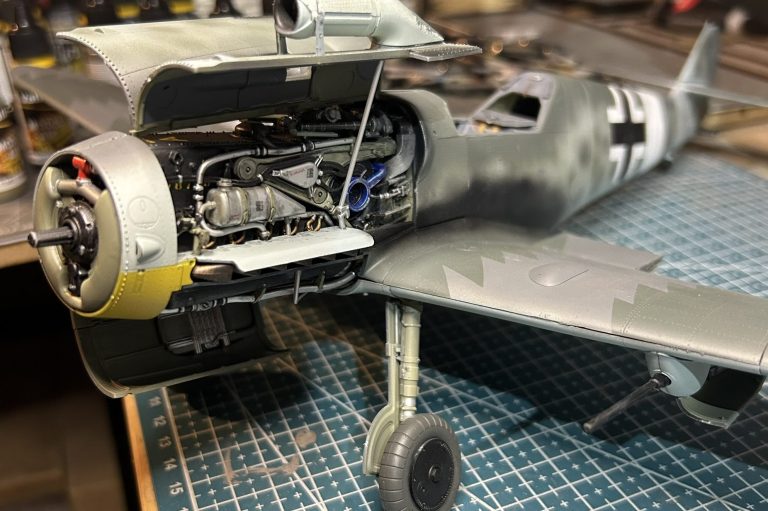
Cowling
This kit gives you the choice of detailed engine with cowling open, or shadow engine with cowling closed. You can't put the full engine in and then close the cowling.
Filters and covers
Both cowling are added, plus the airfilter (this is a Trop version of the 109G-6).
More guns
The other gun pod on.
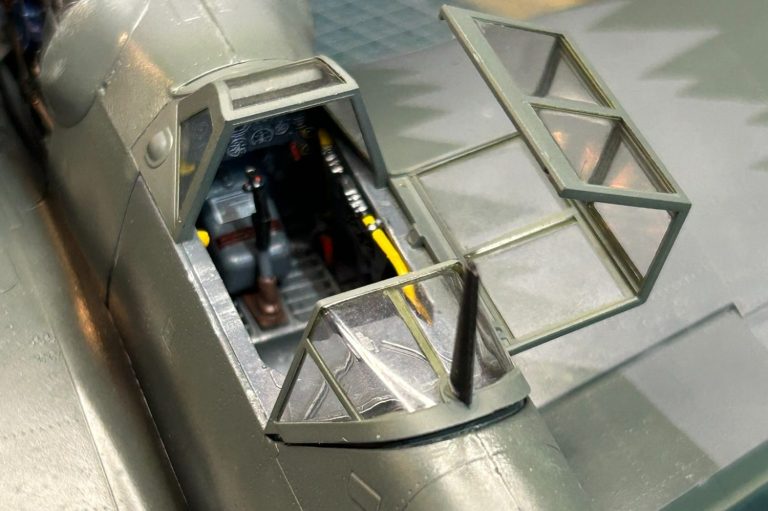
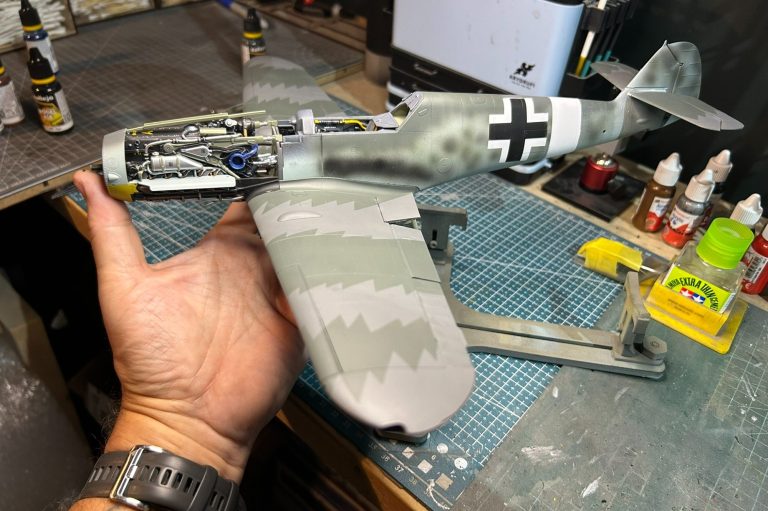
Canopy
Going for the canopy open and NOT the Arla version. The scheme A has 3 part canopy. Sadly the back part would NOT sit down as far as it should. :(
Build done?
And with that the build is done, save the fuel droptank which I'd put on later.
Beginning of the end.
The last few steps take almost as long and the build! Once the build is done, it's on with a gloss varnish to help the decals stick. Then the decals. then panel lining and weathering and finally a coat of matt varnish to finish off.
Decals
Quiet a few decals to add. The bigger ones are tough to get in place and get the air out from under.

More stickers
Top down view
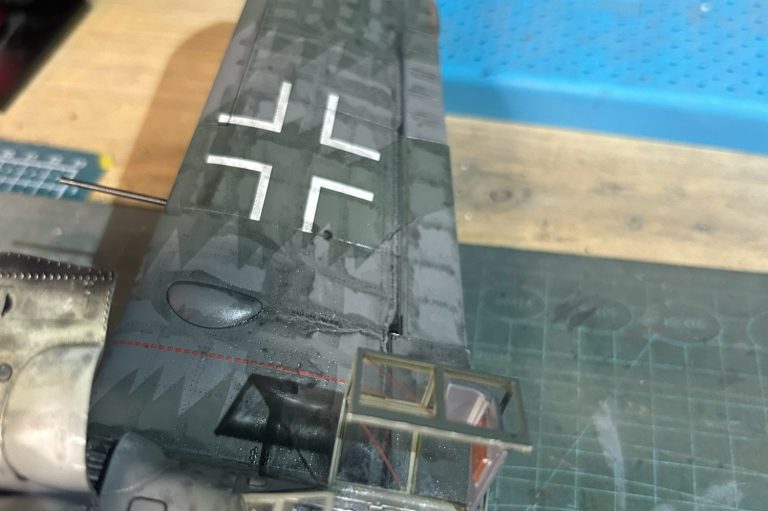
Panel lines
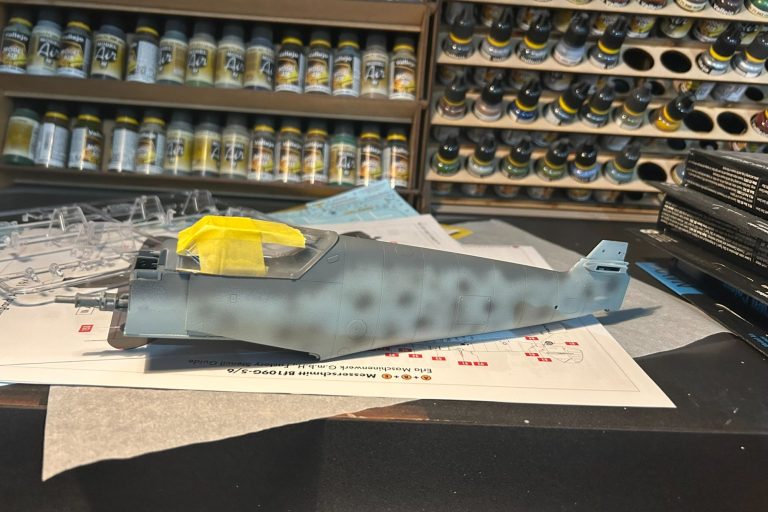
Using AK black panel liner, I went over the whole plane to give the weathering look of a well used fighter.
Cross
The swastica is my only after market item. I have a sheet of decals as Airfix don't supply the kit with one.
Underside
More panel wash. Once its dry I use cotton swabs to wipe off the excess.
Almost there
Wipe this off, spray on the varnish and I'm done!!
And.....she's done!
Built, painted, gloss varnish, decals, weathering, panel wash, matt varnish. 50+ hours and I love it.
Airfix 1:24 Scale F6F Hellcat
I loved building the BF109, regardless of how tough it was, it was such a reward to see a happy client when she landed at his home! He almost imediately said, "I want another one"....so I searched and found the F6F he craved.....and how much fun was this to build???! WOW.
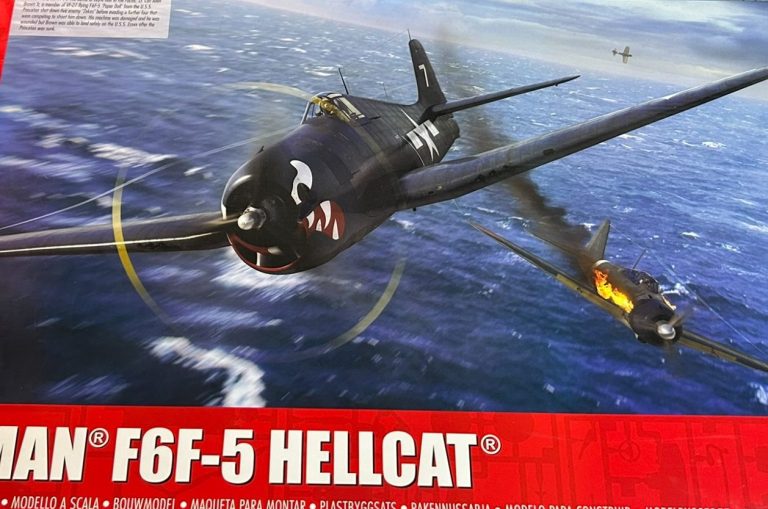
She's here.
Not a cheap kit, currently NOT in produciton, so you have to go ebay to find one.
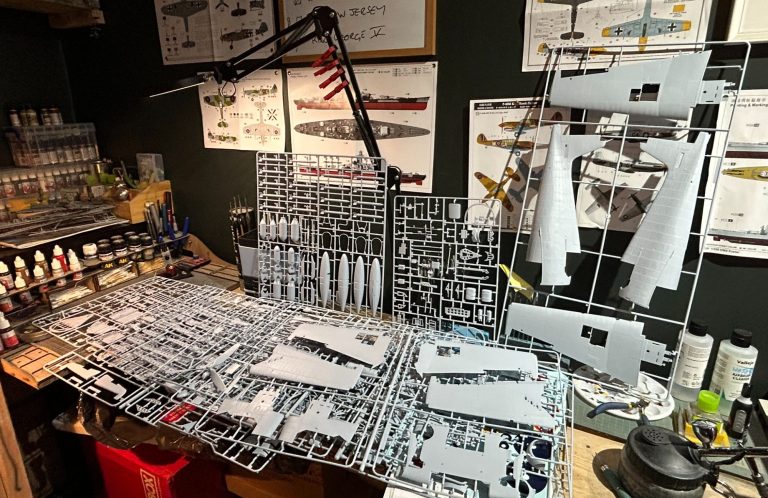
Spru - Spru - Spru
Now that is a lot of parts!! Job 1 is to prime them all ready for painting. I also like to trim off spru where I can.
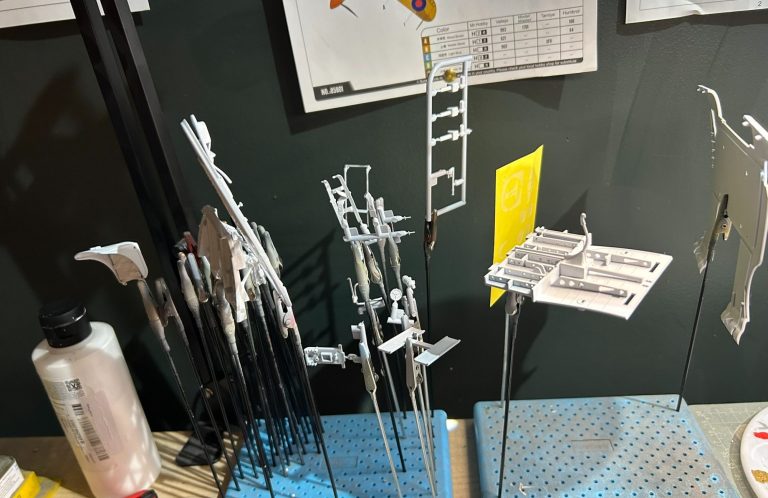
Primed & Ready
Priming & painting BEFORE construction allows for easier access and a better finish.
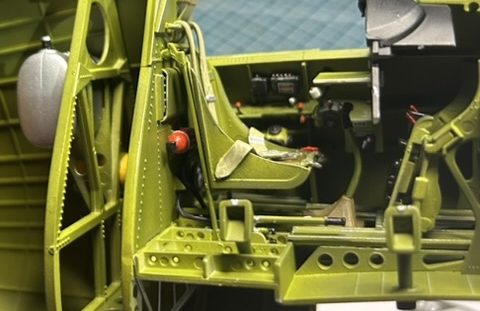
Cockpit
Pretty advanced, but seat, control stick and floor in.
Cockpit side
One side of the cockpit showing instruments, dials and levels. The otherside is just as detailed!
Instrument Panel
Instrument dials with decals added, little map table with map out!!